A smart button to call a workflow in CRM in 6 steps
Often I get the following question from our customers: “Is there an easy way to add a button in the ribbon to call a workflow instead of navigating to flow > run workflow”. By adding a button in a ribbon will help the user to make less mistakes.
To create the above requirement you have to install two solutions in CRM, the RibbonWorkBench, SmartButtons and of course create a workflow you would like to call when clicking on the button. Below you can find the information where you can download the solutions:
- RibbonWorkBench – download source: https://www.develop1.net/public/rwb/ribbonworkbench.aspx
- SmartButtons – download source: https://github.com/scottdurow/RibbonWorkbench/releases/download/SmartButtons.v1.2.638.1/Develop1SmartButtons_1_2_638_1.zip
After installing the prerequisites solution above, you are able to start to create your first smart button in CRM. In the steps below , I’ll guide you through the process how you can do it easily without having any knowledge of programming.
Step 1:
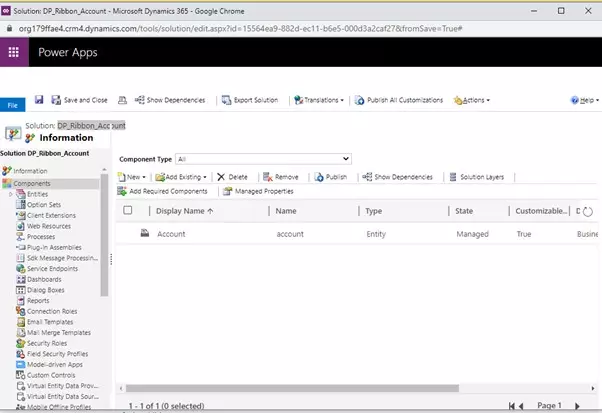
Create a base solution with the entity you would like to add the button, in our case it will be the account entity:
Step 2:
Copy the workflow/process name you would like to use by clicking the button. The workflow,
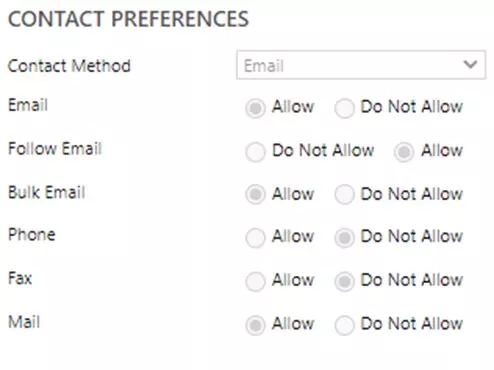
DP Account – Update Contact Preferences, I’m using is updating the account preferences to e-mail.
Step 3:
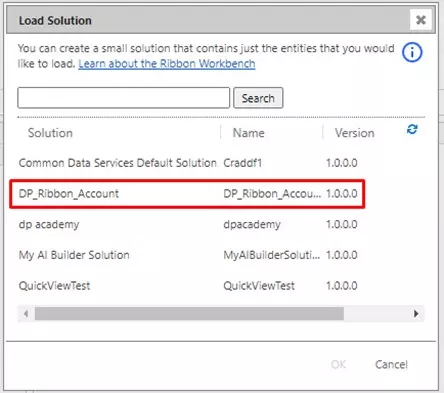
To create our first smart button, you have to navigate back to Settings> Solutions and click on the RIBBON WORKBENCH button on the header of the solutions overview. This will open a new window with a overview of the available solution you can use. Here we select the solution we have created in step 1 and click OK.
Step 4:
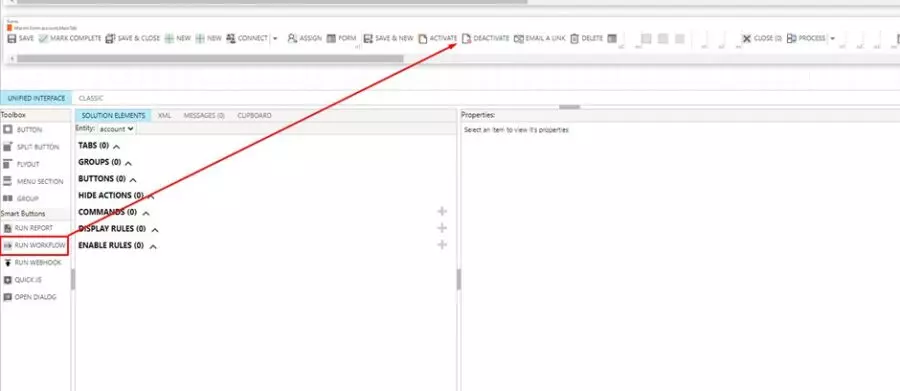
After loading our solution in, you will see a lot of information about the ribbons we can use to place our smart button. The smart buttons are defined on the left bottom side. In our case we will use the Smart Button – Run Workflow and we will place it on the Form ribbon next to the button Activate.
Step 5:
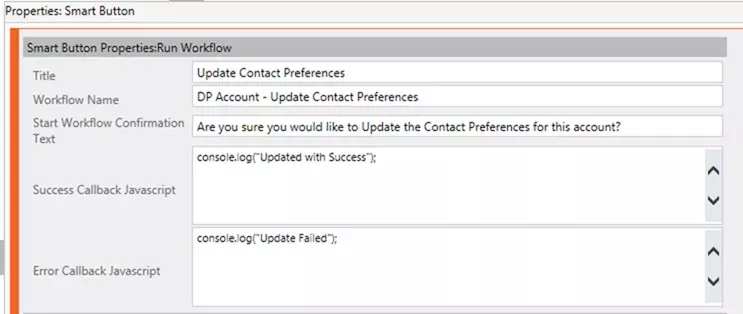
After placing the Smart Button in the ribbon, you need to fill in some information:
Title – The name you would like to give to your button and the users will see in CRM, I will name it Update Contact Preferences.
Workflow Name – The workflow you would like the use / call by clicking the button. The name of our workflow is: DP Account – Update Contact Preferences (copied in Step 2).
Start Workflow Confirmation Text – This is the information you would like to show to the users when clicking the button and before running the workflow.
Success Callback Javascript – The message you would like to show when the workflow runs successful in the console.
Error Callback Javascript – The message you would like to show when the workflow runs unsuccessful in the console.
After filling in the necessary information you can click on publish on the top of the screen to make the Smart Button available in CRM on the account form.
Step 6:
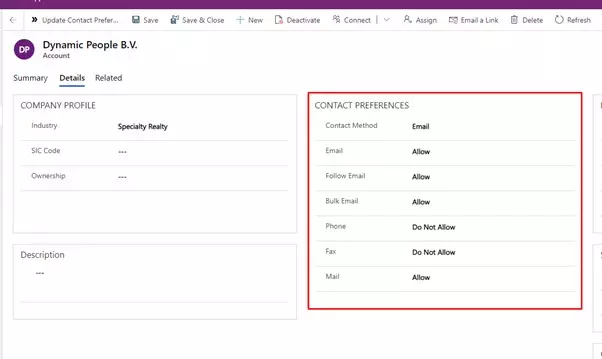
Lets test the smart button we have created. Navigate to the account entity and open one of your accounts. As you can see in the print screen below, on the top left, the button we have created and in the middle of the screen the information that needs to be updated.
When clicking the Smart Button we have created, you will get Start Workflow Confirmation Text shown, which we have described in Step 5.


