Automatically register emails as a new case in Dynamics 365 Customer Engagement
How can you ensure that emails coming in through a shared mailbox are automatically registered as new cases in Dynamics 365 CE, now that the old method via Service Management in the Customer Service Hub is being deprecated from April 2023?
Many companies use one or more general e-mail addresses. It enables (potential) customers to contact the company in an easy way, for example to make service reports or request quotes. And the company has a better view of the incoming notifications and requests.
In this blog I will explain how you can set up the process ‘from e-mail to case’. In other words, how to get e-mail, which arrives via a shared mailbox, into Dynamics CE (CRM) and have it automatically converted into (service) cases. The Dynamics 365 system administrator role is required to set up the process. I assume a shared mailbox is available.
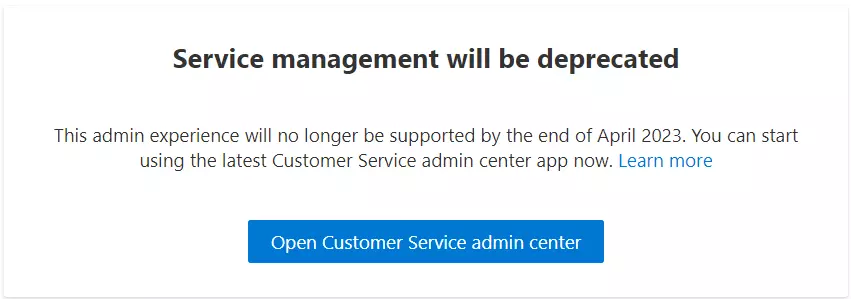
SERVICE MANAGEMENT CUSTOMER SERVICE HUB WILL BE DEPRECATED AS OF APRIL 2023
The old method, via the Customer Service Hub app, to arrange this process will expire in April 2023. That is already in a month and that is why it is now time to switch to the new method. This is done through the Customer Service admin center app and you use Power Automate to create the cases. The service management area in the Customer Service Hub will be hidden by default in new organizations and environments in April 2023 and support will be discontinued by Microsoft.
SET UP EMAIL SERVER SYNC
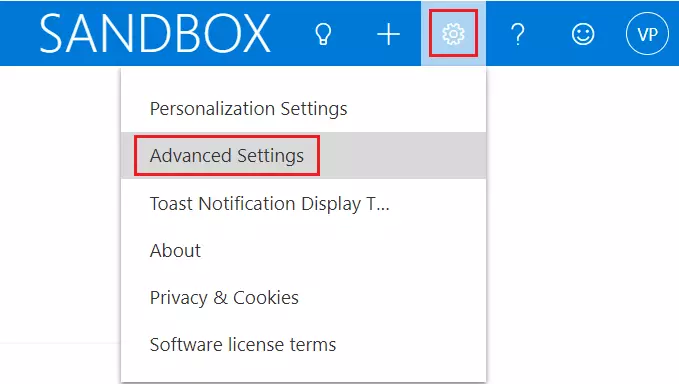
The first step in setting up the ‘from e-mail to case’ process is to update the general e-mail settings. For that we are switching to the old Dynamics 365 interface. From any model app you can access this classic interface via Advanced settings.
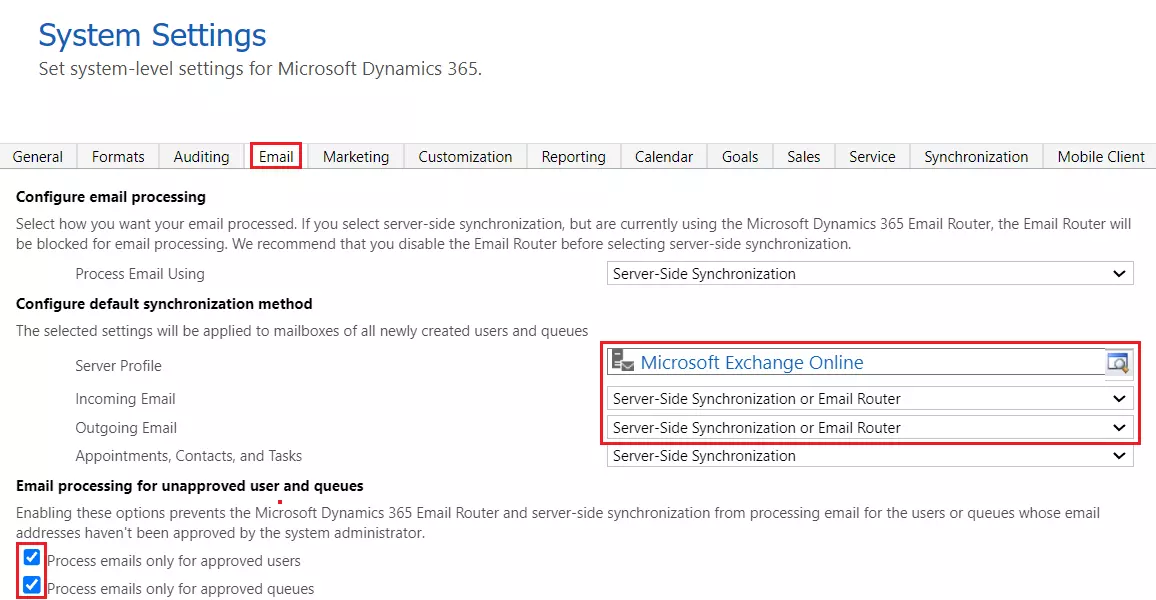
Navigate to Administration, System Settings.

The Microsoft Exchange Online server profile is already created by default. Set incoming email to Server Sync. If necessary, also set the outgoing e-mail to server synchronization. This is useful if you want users to be able to email from CRM without going through Outlook. Incoming and outgoing e-mail settings are standards that can be deviated from individually per mailbox. Check “Use correlation to track email conversations” so that email responses are tracked and associated with existing cases.
Enabling ‘Only process emails for approved users / queues’ can only be done by a Dynamics 365 system administrator who is also an Exchange or global Office 365 administrator.

CREATE THE SHARED MAILBOX QUEUE
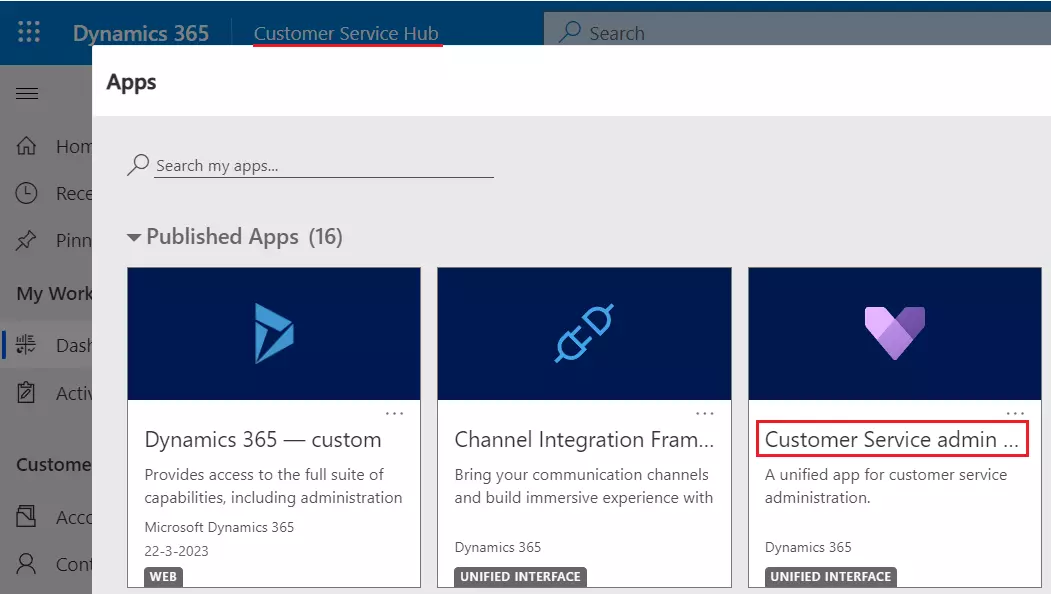
Queues can be used to distribute work among agents. However, in this scenario, we use the queue as a go-between for the incoming email. You create the queue in the new Customer Service admin center. Click on the name of the app at the top to display the overview of all apps available to you. Open the Customer Service admin center.
Navigate to Queues, manage basic queues.

Click New to create a new queue.

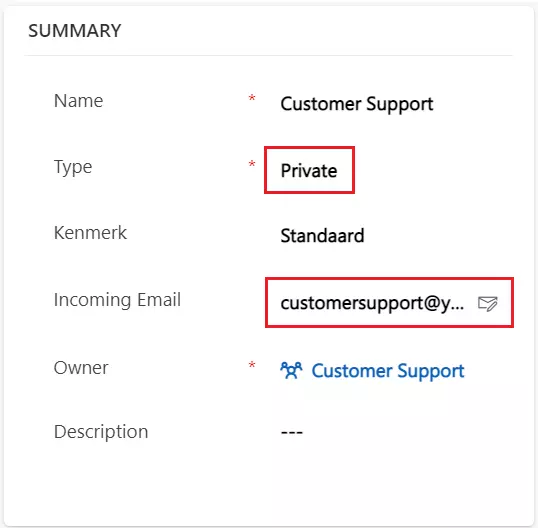
Give the queue an appealing name that preferably matches the name of the shared mailbox. That is also the name that a (potential) customer sees if you want to send e-mail from CRM with the queue as the sender, whereby the signature of the queue is automatically added if you set it here. Change the type to Private to manage access to the queue by adding members (users). If you want to set up a Team as an owner, make sure that the Team has at least one customer service security role before creating the queue.
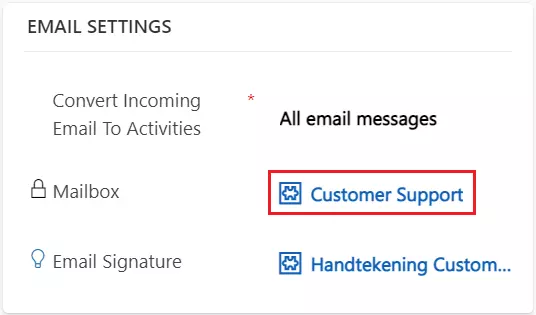
Add individual users to give them access to the queue.

Approve the queue. This can only be done by a Dynamics 365 system administrator who is also an Exchange or global Office 365 administrator.

APPROVE AND ENABLE SHARED MAILBOX
The last step to ensure that email enters Dynamics CE as queued items is to approve and enable the mailbox associated with the queue. If you click on the mailbox of the queue you just created, the message below will appear. You manage the mailbox via the classic interface.
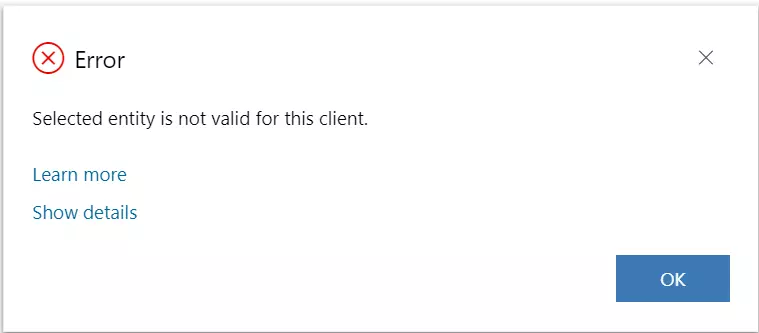
Switch to the legacy Dynamics 365 interface. Navigate to Settings, Email Configuration, Mailboxes.

In the “All mailboxes” view, find the queue you’ve created in the previous step. Open the mailbox. Click on the buttons ‘Approve email’ and ‘Test and enable mailbox’. These actions can only be done by a Dynamics 365 system administrator who is also an Exchange or global Office 365 administrator.
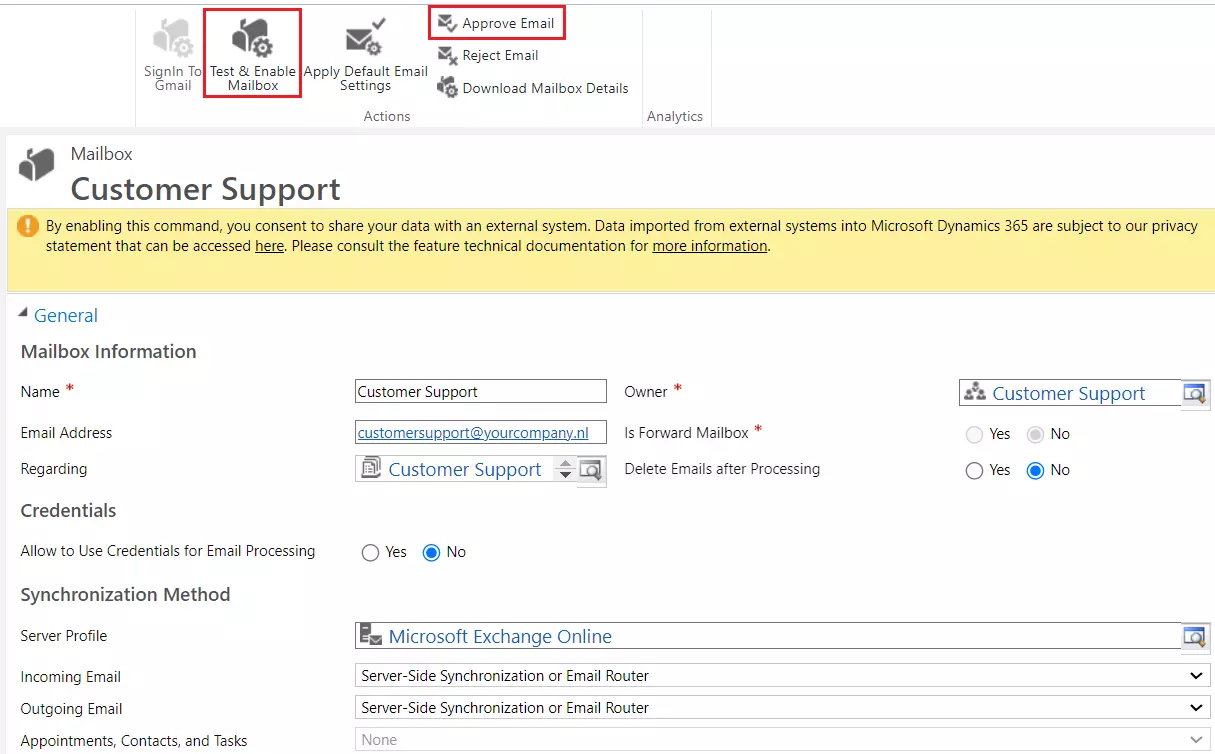
Enabling the mailbox is successful if the status of incoming and outgoing mail is Succeeded. Afterwards there is a queue item in the queue called ‘Your mailbox is now connected to Dynamics CRM’.

Send a test email to the shared mailbox. Within a few minutes you will see a queue item appear.

CREATE RULE: FROM EMAIL TO CASE
With the previous steps, we set up email sent to the shared mailbox to arrive in Dynamics CE as queued items. Now you can use queue items as a base to distribute the work among the agents, but that’s a different scenario. In this scenario we want the queue items to be automatically converted to (service) cases, where the email will be automatically linked to the newly created cases.
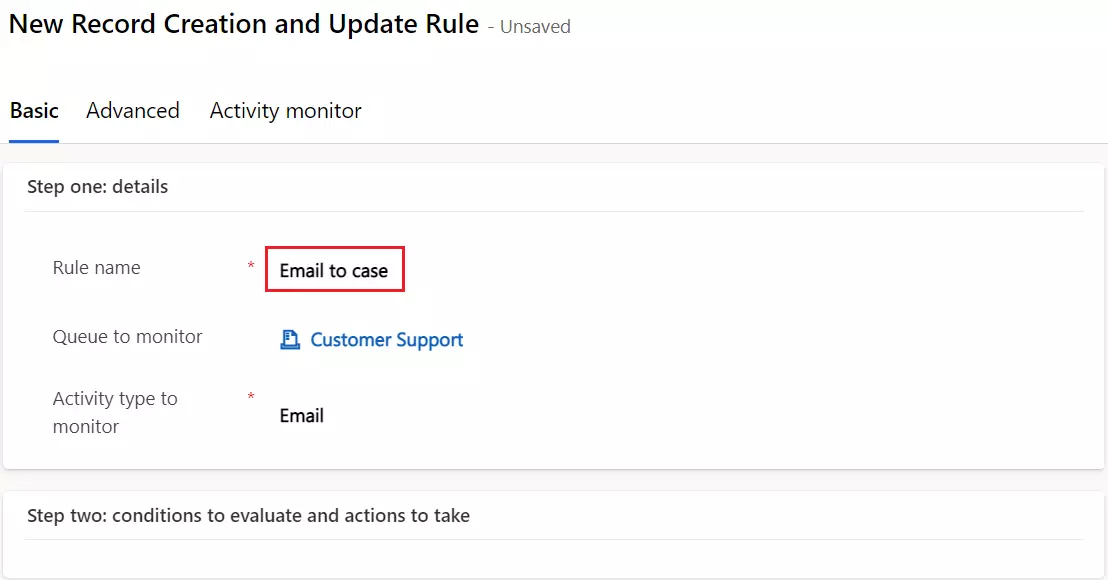
Open the Customer Service admin center. Navigate to Queues, Manage Basic Queues. Open the queue. Add a new rule under ‘Rules for creating and updating records’.

When creating the new rule, you can optionally set an e-mail template, which is automatically sent to the sender of the e-mail, for example a confirmation of the registration of a new case. You create email templates in the Customer Service Hub.

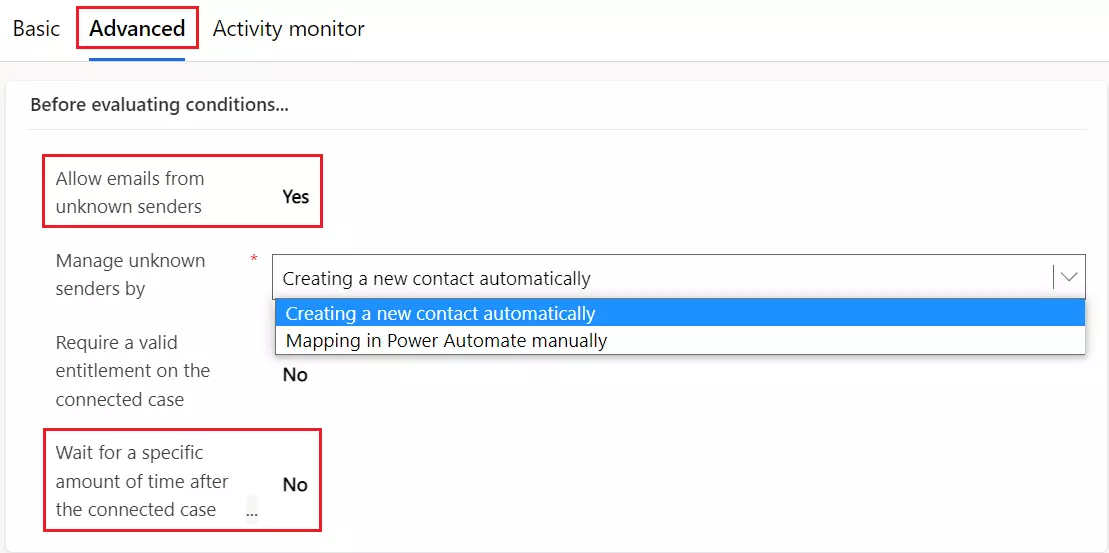
A few optional settings can be set under the Advanced tab. How do you want the system to handle email from unknown senders? In the example below, we allow that, and say that a contact should be created automatically. And e-mail that arrives after the case has been closed, do you want the e-mail to be linked to the existing case or to create a new case? In this example ‘Wait a certain time…’ says No; so a new application is always created. Save the rule.
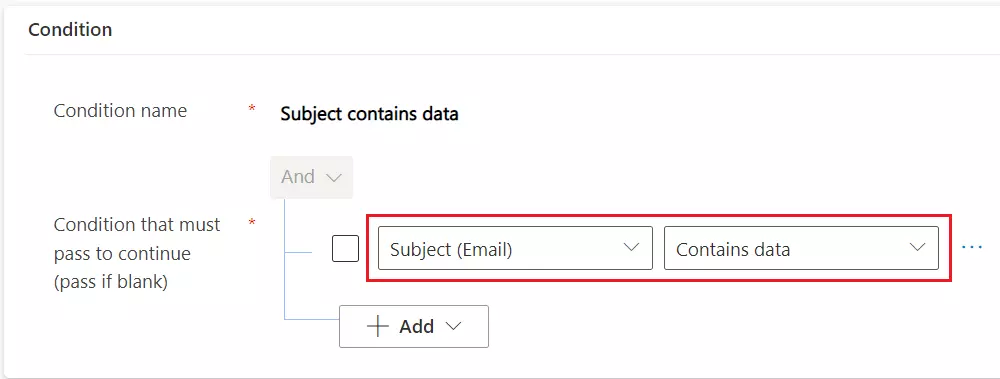
In step two, click New to set a condition and action.

Set the condition that the subject of the e-mail contains data. This means that all e-mail that arrives at the shared mailbox must be processed. Click “Save and Open Power Automate.”
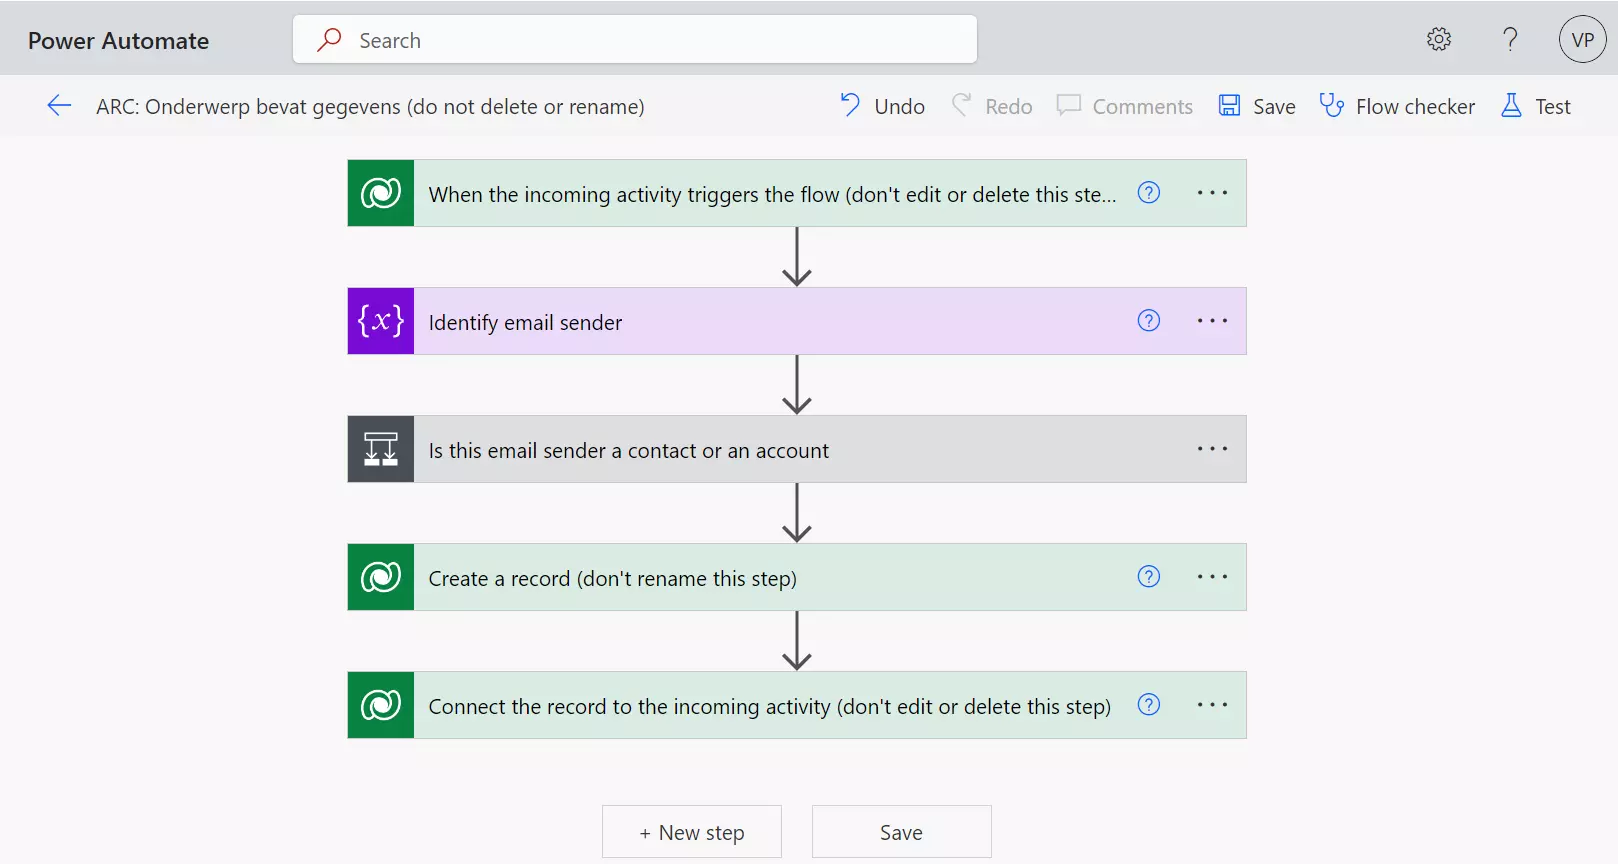
You will be automatically redirected to the Power Platform. Dynamics CE has prepared a standard flow for converting queue items to cases. The great thing is that you can adjust the flow to your liking. This way you can retrieve extra information from other dataverse tables and save it with the case. You can also include extra actions such as tasks or e-mail notifications in the flow. Please note that some steps state that you may not modify or delete them. Adjusting and/or extending the flow falls outside the scope of this blog. Save the default proposed flow and close the window.
It is recommended to use a Service principle as a connection reference. My colleague Marwin Hogeterp has written a blog about this.
Activate the rule.

Send a new test email to the shared mailbox. Within a few minutes you will see a case appear.
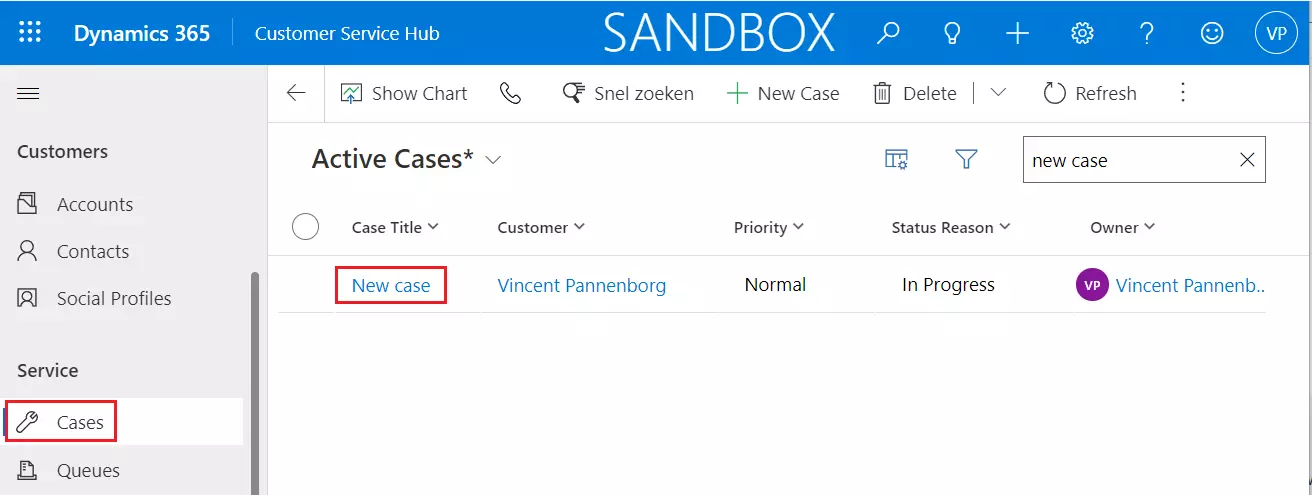
This completes the last step and the process is set up. All emails that arrive at the shared mailbox are automatically converted into cases. And if the email is a reply to an open case, the email is automatically linked to the existing case.

