Let’s consider a scenario: In the Accounts table, we want to allow users to select a finance team member to approve an Account. It’s crucial that every approval includes a comment and an assigned reviewer.
In the following sections, I’ll walk you through the process I used to fulfill this requirement using a Power Apps custom page. Stay tuned!
1) Create your custom page.
The journey begins with the creation of your custom Power Apps page. Pictured below is a simple yet effective design example. Remember, for a responsive design it’s good practice to place your components within a container!
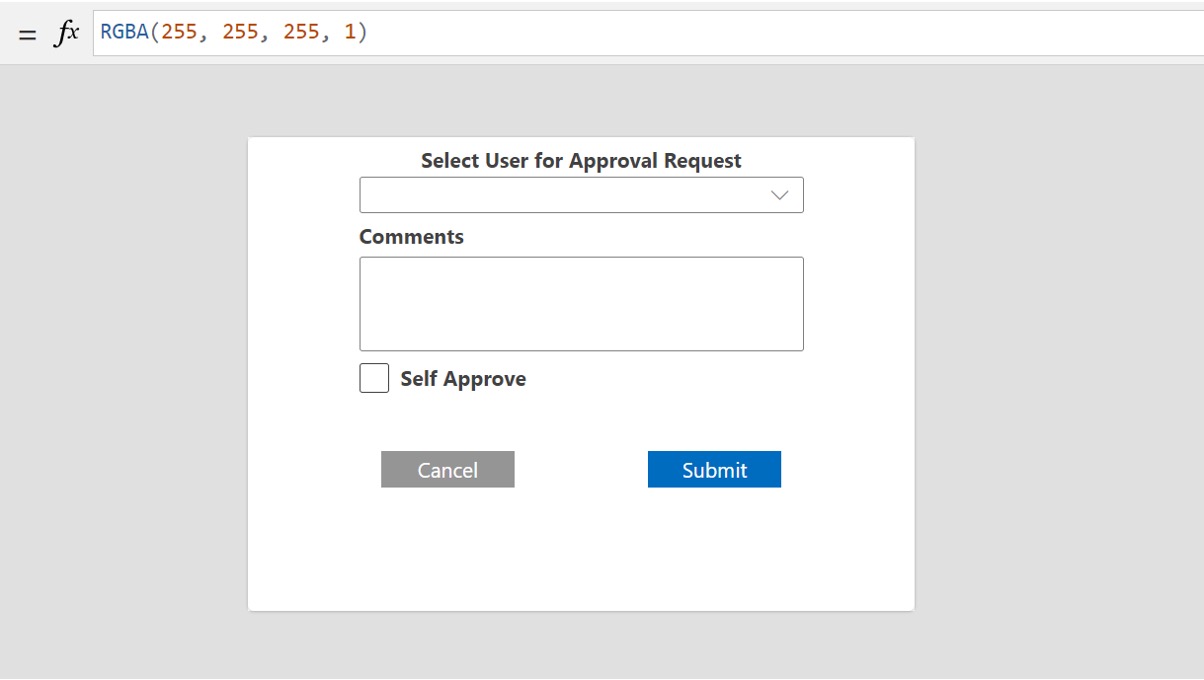
Simple PowerApps custom page.
2) Add your custom page into your model-driven app.
Once you are happy with your custom page and it is saved and published, the next step is to add the custom page to your model-driven app.
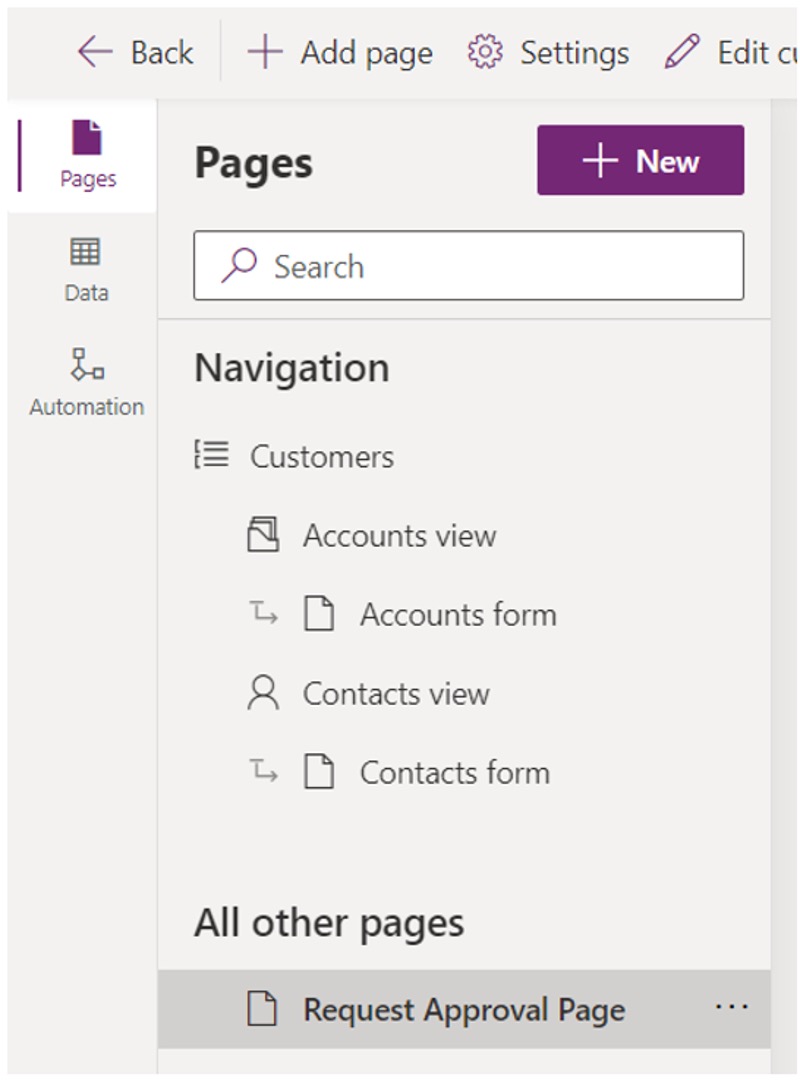
Add your custom page to your model-driven app.
3) Use XrmToolBox Ribbon Workbench to create your button.
In this article I am going to use the familiar Ribbon Workbench tool for the button creation. Another option could be using the command designer. Customize the command bar – Power Apps | Microsoft Learn
In the video snippet below, you can see me adding a new “Request Approval” button using Ribbon Workbench, I am adding this to the form ribbon.
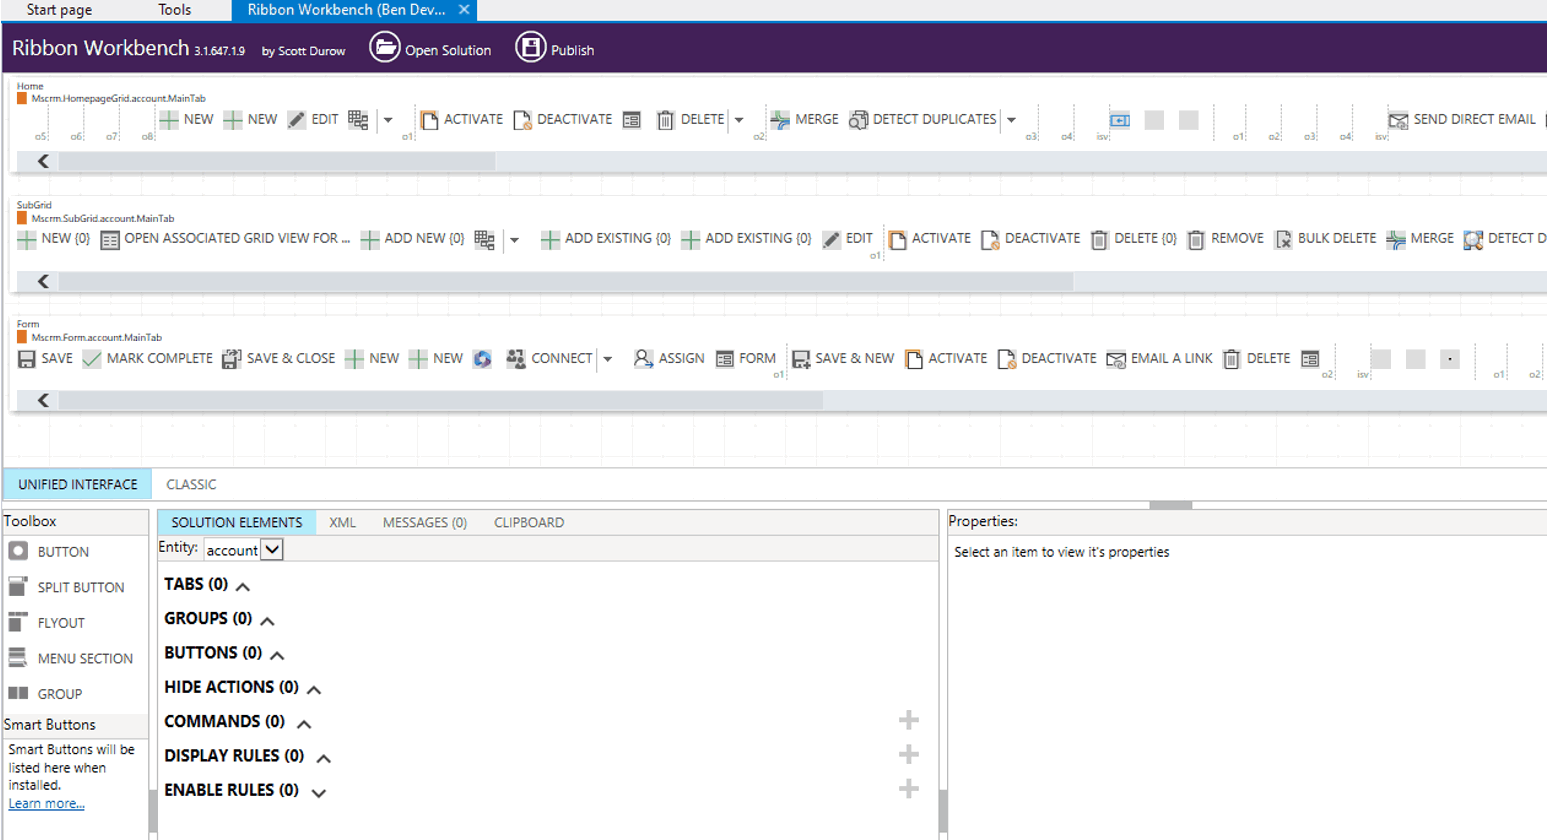
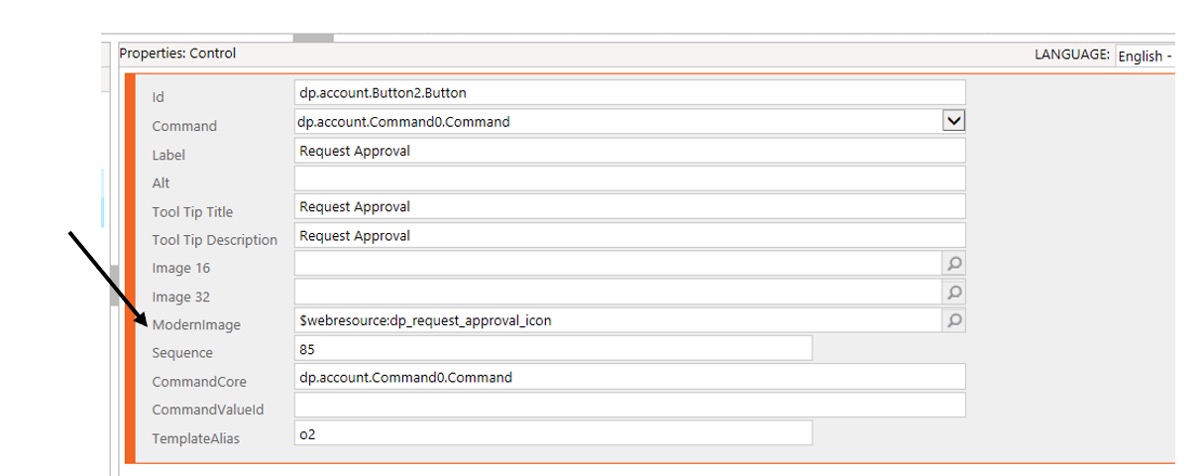
Adding an icon to your button.
4) Add JavaScript to your custom button.
To add some extra functionality to your custom button, you’ll need to incorporate code. In the screenshot below, you can see an example of some simple JavaScript code that you could use (I personally prefer using TypeScript). Once you’ve created your code, make sure to create a web resource for it within your environment.
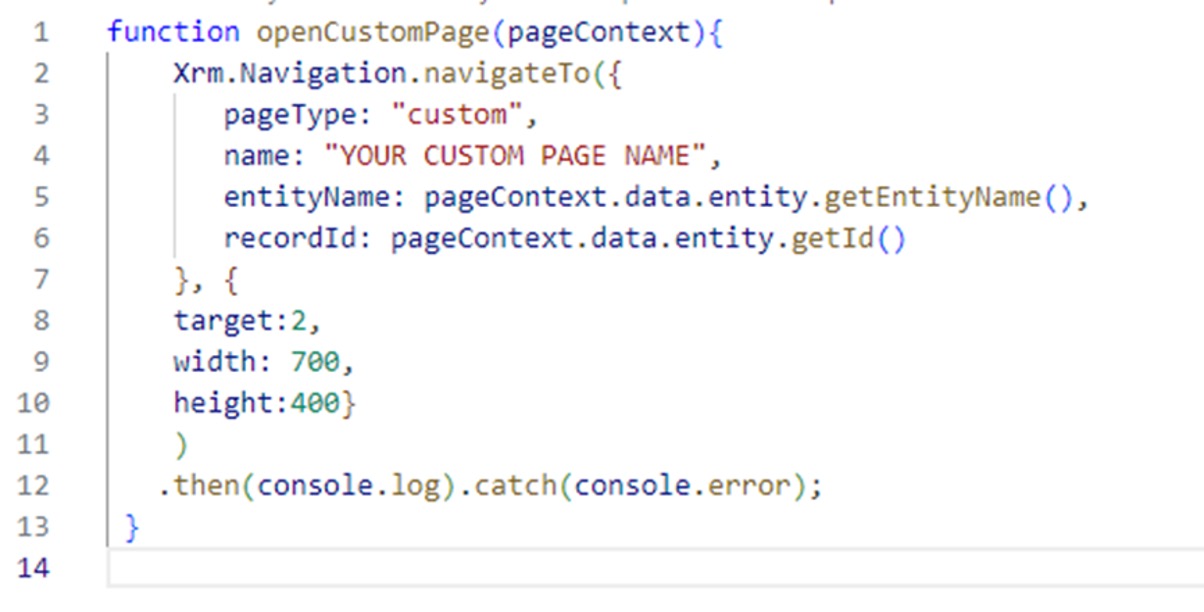
Simple JavaScript to add to your button.
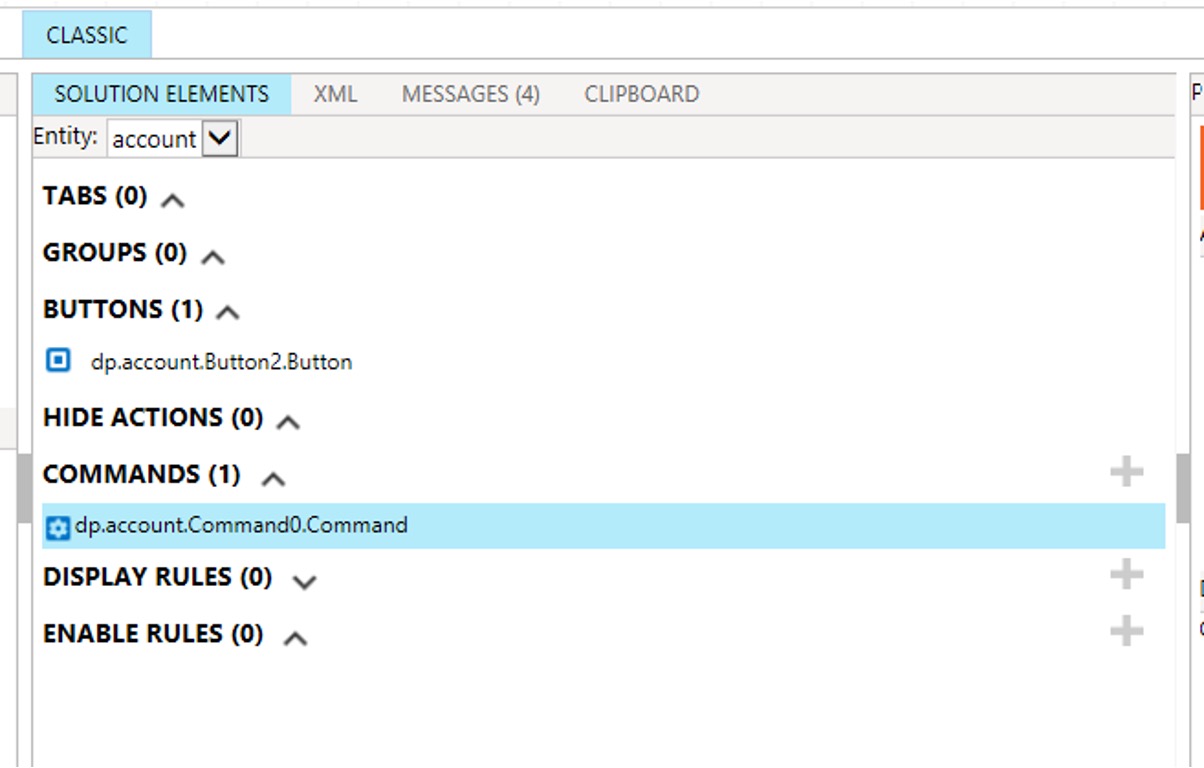
Create a command in Ribbon Workbench.

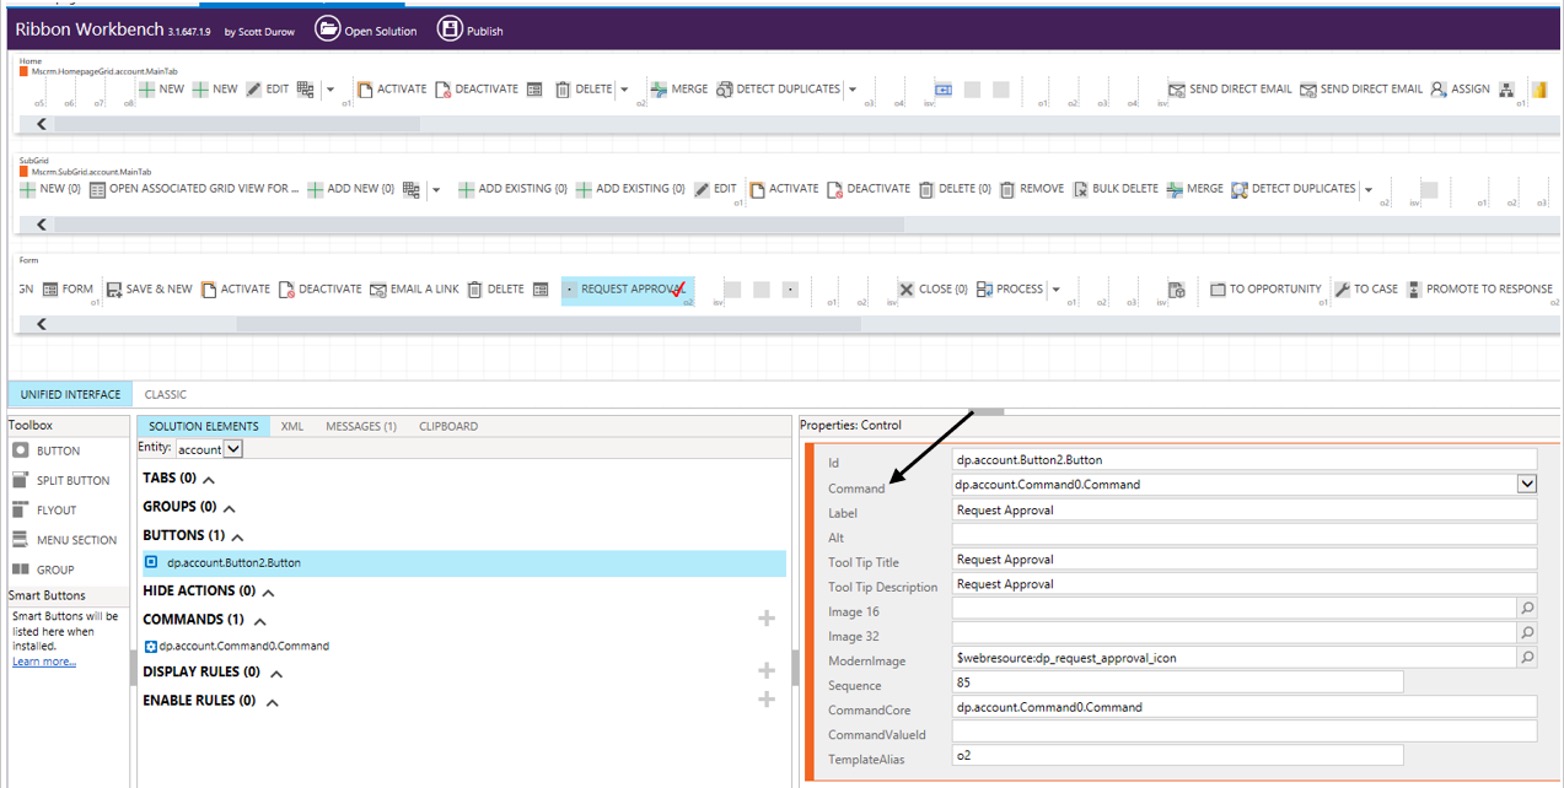
Link your command to your button.

5) Now navigate to your table and open a record.
Your custom button should appear in the ribbon.

6) Open your custom page.
After a user clicks the button, the custom page pop-up will appear, allowing them to request an approval within the record they have open. This is one of the nice features of Power Apps custom pages!
7) Make sure to include your validations and notification messages.
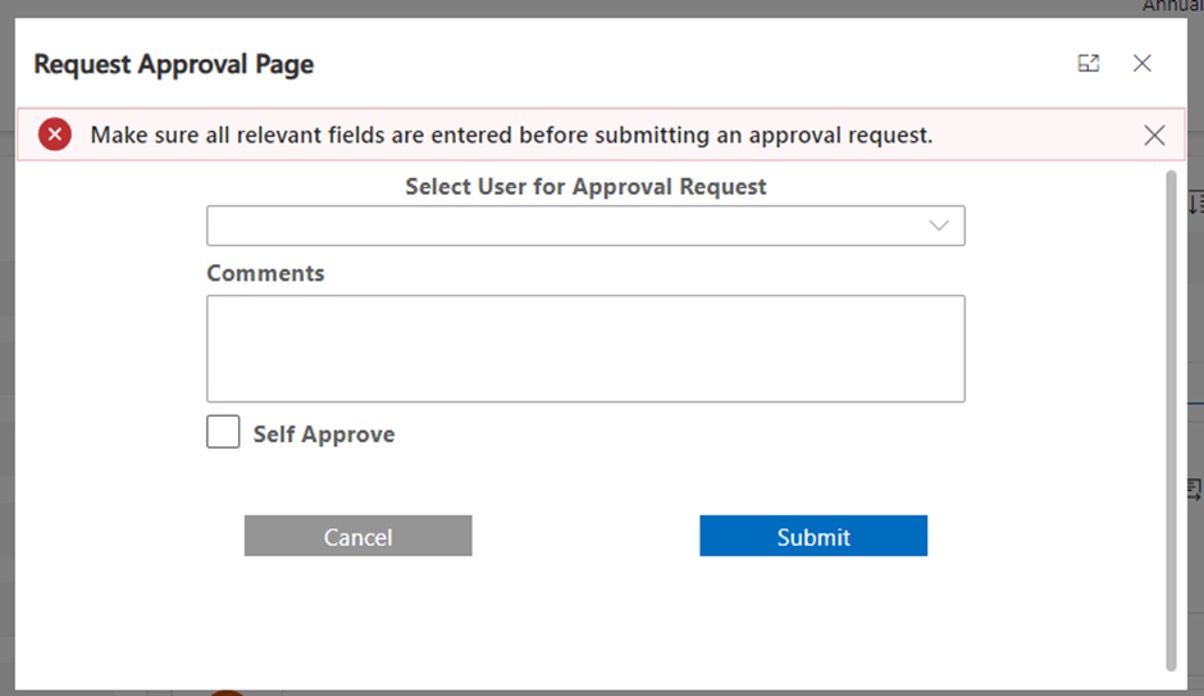
The example scenario I mentioned stated “It is mandatory that all approval’s contain a comment and a user who is going to review the approval.” Therefore, if a user attempts to submit an approval without this information entered, it is important the approval request is not submitted and an error message appears.
8) Next steps….
Depending on what your requirement is can determine your next steps.
For example in this scenario, once the approval is submitted the custom page could call a Power Automate flow to start the approval process.
If you are unsure how to connect your custom page to a Power Automate flow, check the Microsoft documentation link below.
https://learn.microsoft.com/en-us/power-apps/maker/canvas-apps/working-with-flows
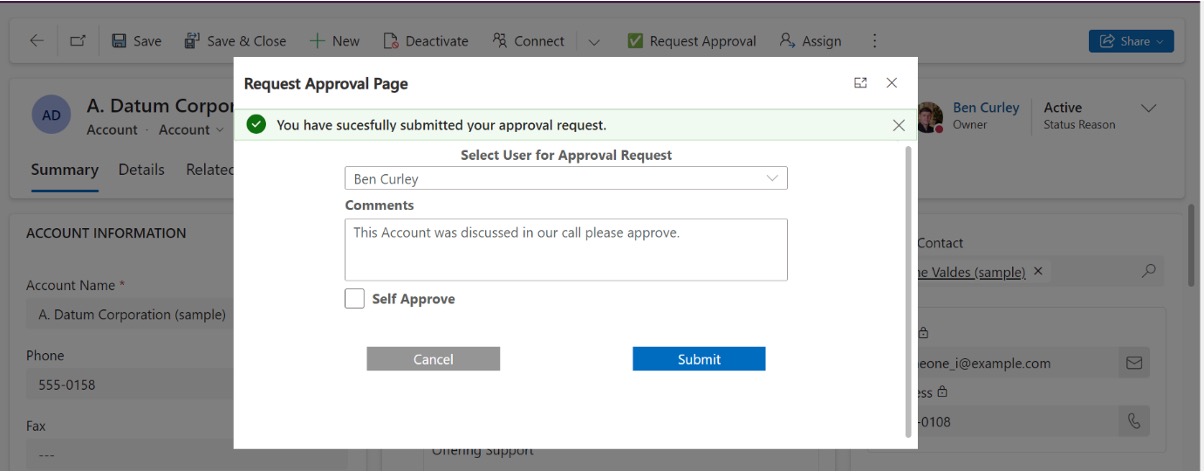
Successful approval.

