This Blog is divided in 3 parts:
- Part 1: Creating a custom button
- Part 2: Writing JavaScript functions
- Part 3: Creating and testing a Power Automate
Requirement:
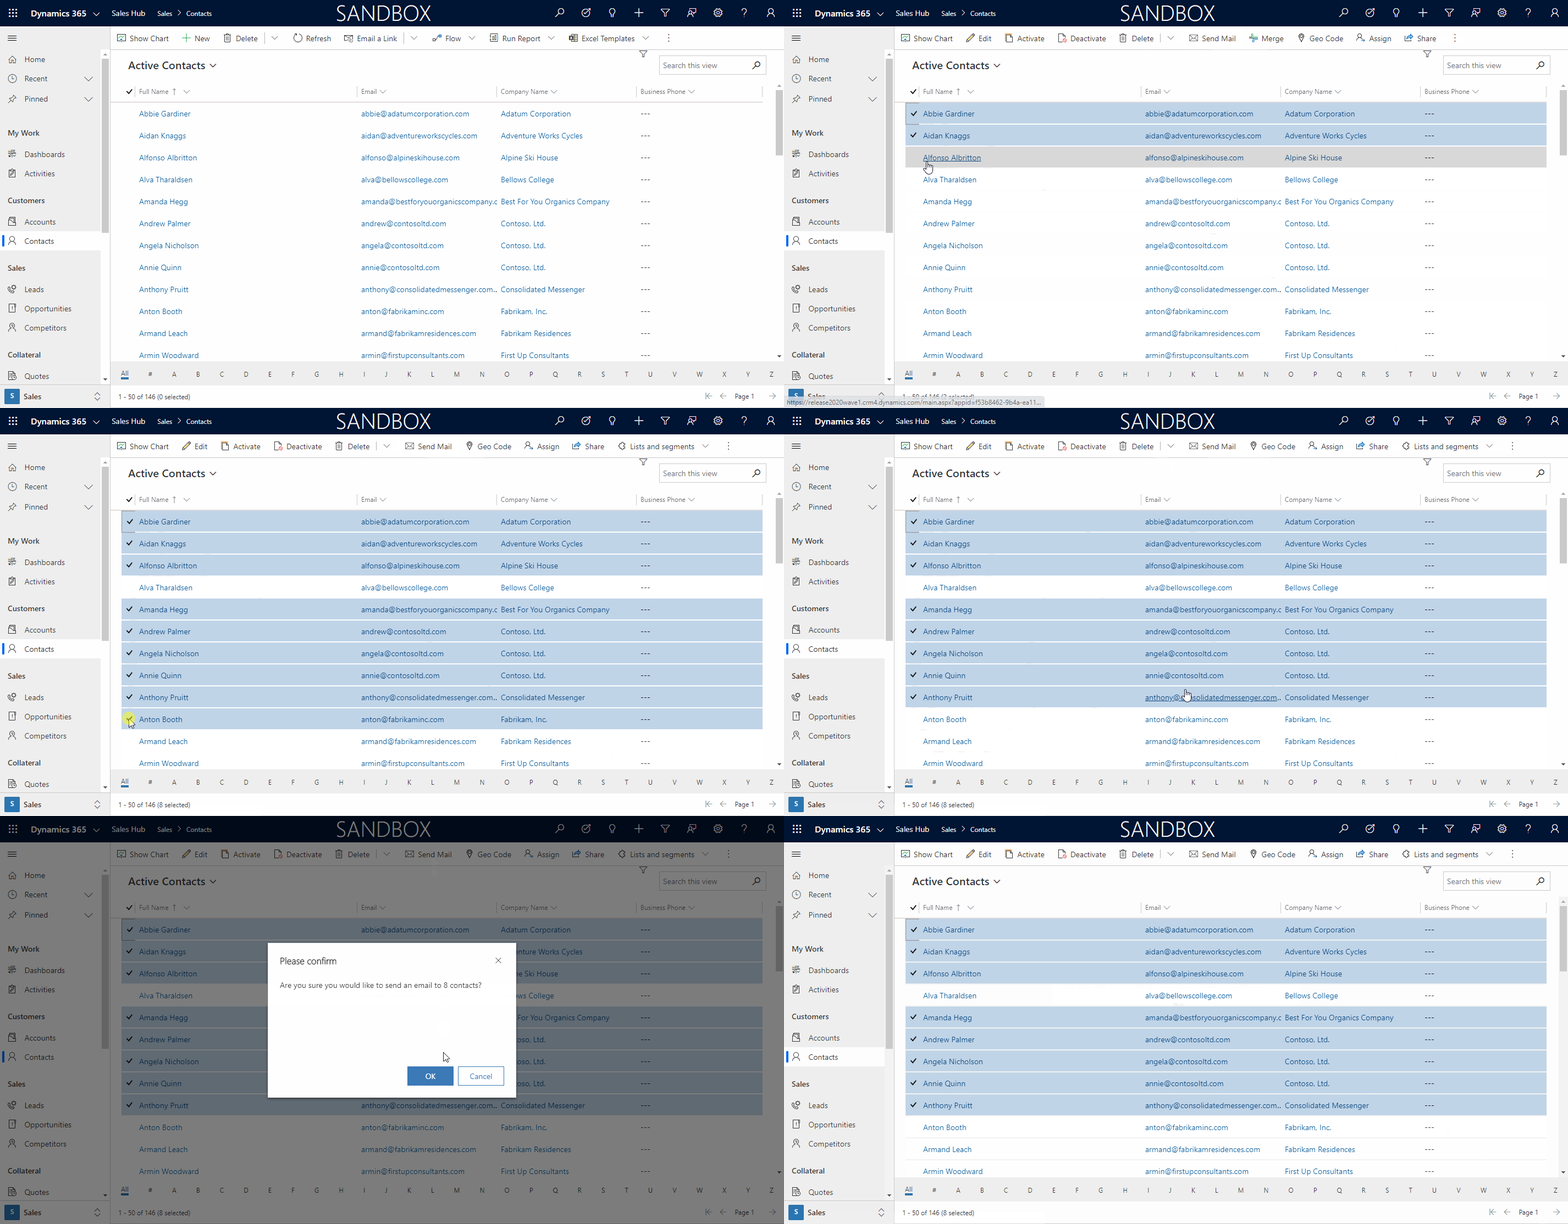
From the Contact homepage view within Dynamics 365CE, select min 2 and max 8 contact records and send them an email. The email needs to be signed with details from the executing user.
Creating a custom button
Before we can start you should download the Ribbon Workbench tool, which is authored by MVP Scott Durow.
Use the website of Develop1 o download the Managed Solution and import it into your Development Instance. Of course, it’s possible to create and manage custom buttons by editing the RibbonDiff Xml, but that’s a very time-consuming task and a typos are easily made.
If you are stuck using Ribbon Workbench, use the customer feedback portal to get in touch or to read the How To’s.
Let’s get started!
Below an overview of the steps I would take to meet the requirements.
Step 1
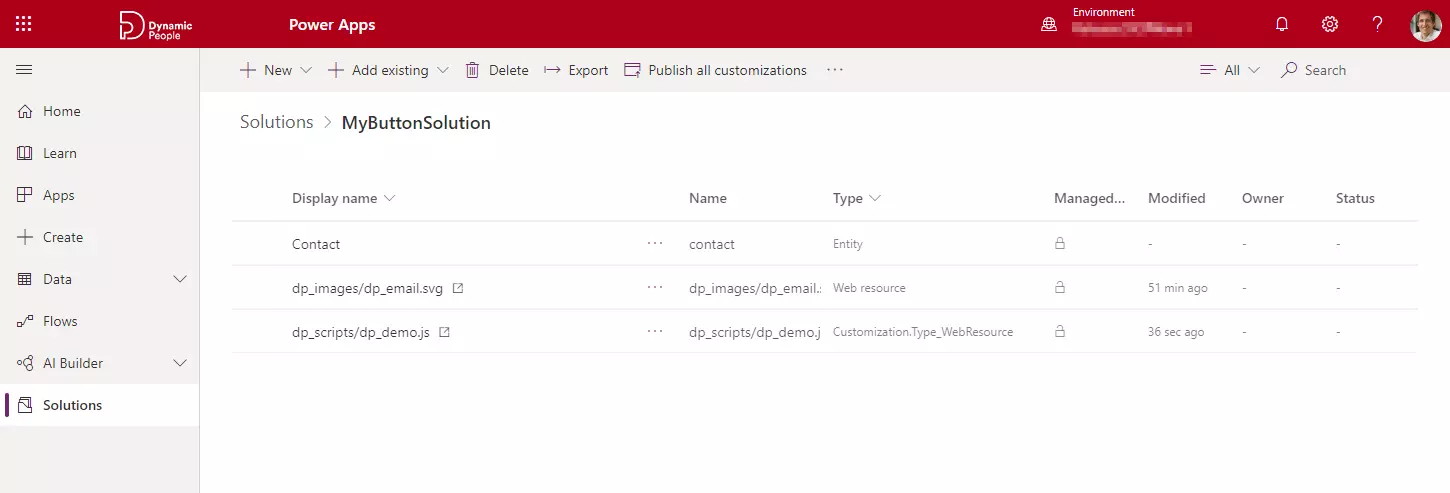
Open https://make.powerapps.com, select the proper environment, Navigate to Solutions and Create a Solution. In this case I have created a solution named “MyButtonSolution”.
Step 2
Add the Entity where the custom button should be visible. In this case it is the Contact Entity. When prompted, do not select any components. No Forms, No Views, No Attributes, No Nothing directly related to the Contact Entity.
The RibbonDiff Xml is the only thing needed to make required the changes, which will be added to the solution when adding the Contact Entity. Adding lots of other components will slow you down when opening, editing and publishing changes. In the screenshot below you will see an image and a JS file added, which is used later on.
Step 3
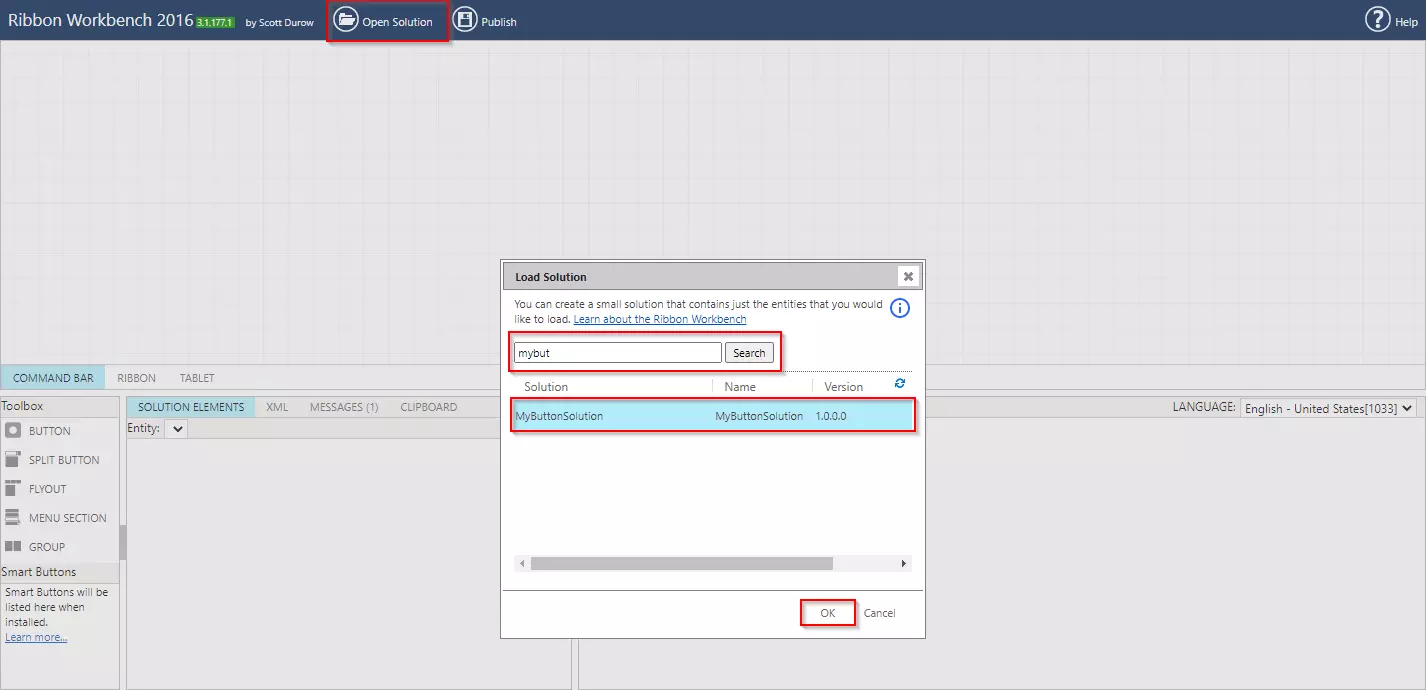
After the “MyButtonSolution” is prepared we can open the Ribbon Workbench Tool. Since I’ve not seen a way to open it via https://make.powerapps.com we’re navigating via the “Old Solution Overview Page”. Use the Open Solution Button or Popup Window to open the “MyButtonSolution”. The Ribbon Workbench tool is downloading content and the editor will load all Solution Elements.
Step 4
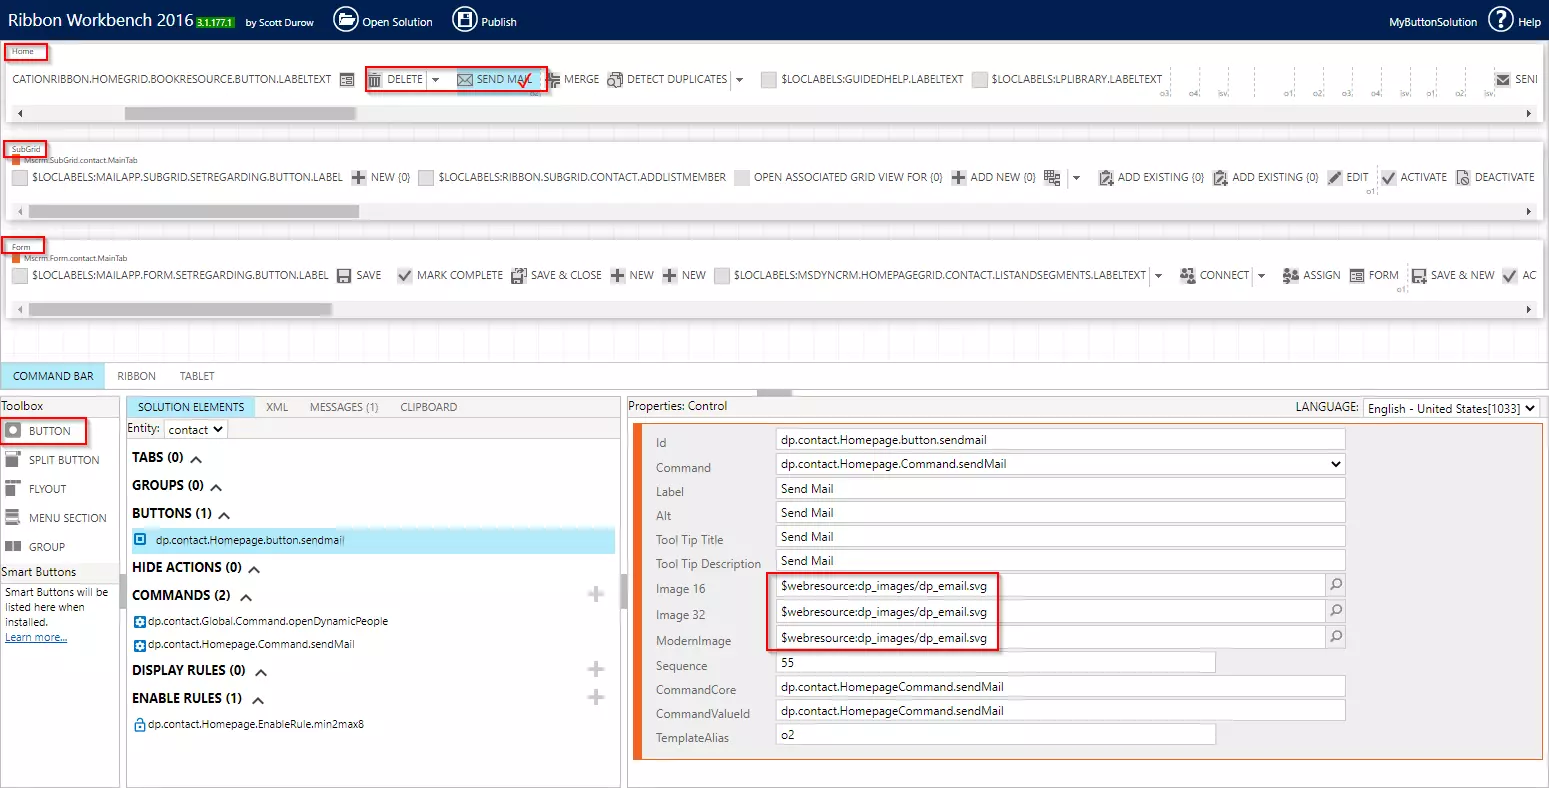
The command bars from the contact entity are shown. The editor makes a distinct between the HomepageGrid, SubGrid and Form. In our case we’re going to add a button to the HomepageGrid.
Personally, I prefer to position custom button(s) next to the OOB delete button. Drag and Drop a Button from the Toolbox towards the HomepageGrid.
Step 5
Select the button you’ve added and update the Button Properties. Try to stick with a naming convention for button id’s, Command id’s and so on. As image I prefer to use SVG only. You could use https://www.flaticon.com for SVG Images, before downloading the SVG set the color to #777777
If you are not adding a command to the button, the button will not be displayed. I often add a general command like, open URL https://www.dynamicpeople.com and use it for testing purposes.
Step 6
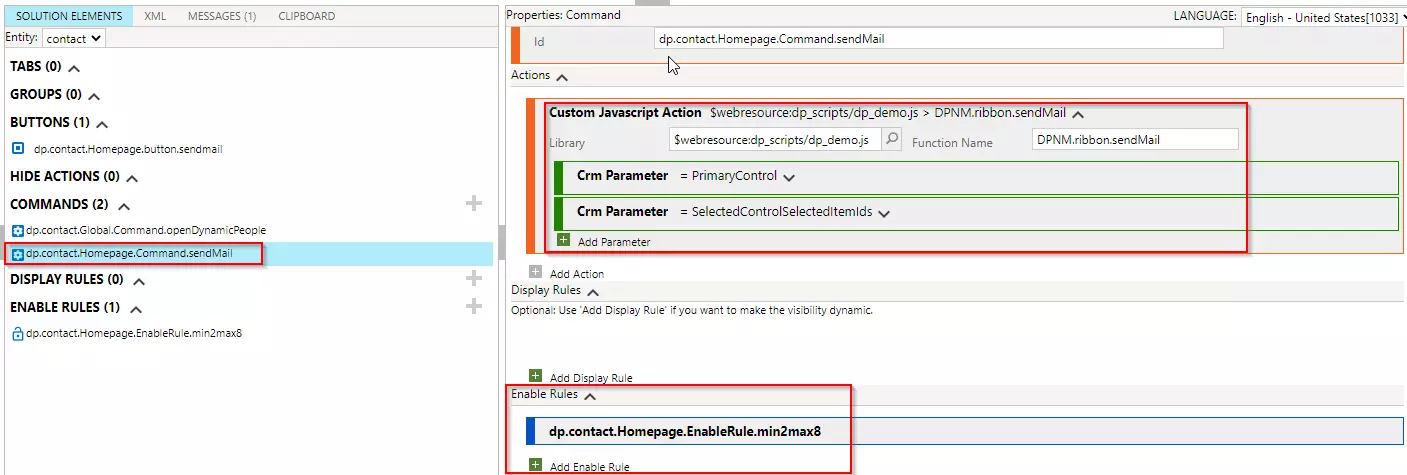
One of the requirements was to have to button displayed only when a minimum of 2 and that a maximum of 8 records were selected. This can be handled by using an enable rule.
Navigate towards the enable rules and create a new rule, including a SelectionCountRule Step. Leave the option Default and InvertResult empty. Set the option AppliesTo to SelectedEntity and the Min and Max to 2 and 8. After creating the rule, add it to the command.
Step 7
Finally the changes made in the Ribbon Workbench Interface will convert into an updated RibbonDiff Xml and can be published via a button click.
The GIF below demonstrates the current result, and a bit of a spoiler. In Part 2: Writing JavaScript functions, we’ll dig in deeper.


