Create reports with Microsoft Dynamics data
Power BI is a collection of software services, apps, and connectors that work together to turn your unrelated sources of data into coherent, visually immersive, and interactive insights. Your data may be an Excel spreadsheet, or a collection of cloud-based and on-premises hybrid data warehouses.
We use the Power BI Desktop to build reports. In this blog, we will show you how to do this with Microsoft Dynamics data. With Power BI Desktop, you can:
- Connect to data, including multiple data sources.
- Shape the data with queries that build insightful, compelling data models.
- Use the data models to create visualizations and reports.
- Share your report files for others to leverage, build upon, and share. You can share Power BI Desktop .pbix files like any other files, but the most compelling method is to upload them to the Power BI service.

To build Power BI Reports based on Microsoft Dynamics data, follow the below steps.
Part 1: Set up a database (BYOD – Bring your own database)
Why is it necessary to have BYOD? This will help to make a replica of the Microsoft Dynamics Database and it will also help to access the original database, which may cause an issue if the data has been changed. So, we bring our own database and export only the tables with data we want to see in Power BI reports.
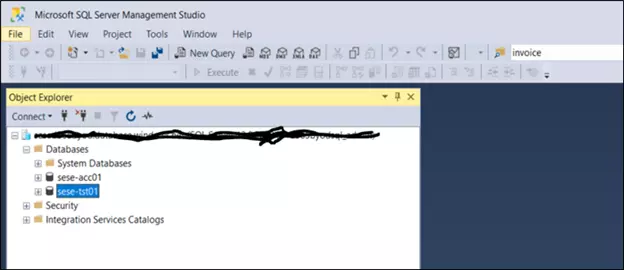
For this example, will be using SQL database in Azure. (As the database is in the cloud, it will be easy to connect to the database at any time.) So, it is preferrable to use the database in the cloud. We need to create an SQL server and database, which we will use to store data from Dynamics. Please refer to this link to create a new SQL server and database in Azure. Once the Azure SQL database has been created, we can open the database in SSMS (SQL Server Management Studio).
Part 2: Export the data from Microsoft Dynamics to Azure SQL
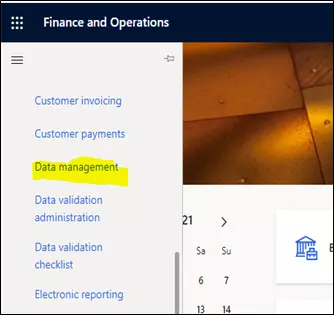
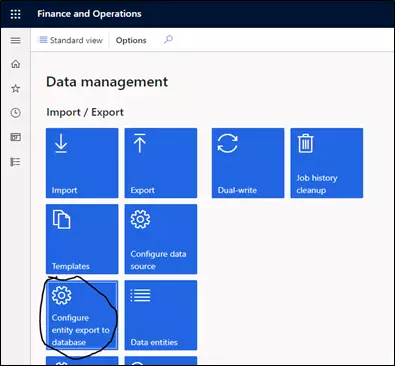
Step 1: Login to Microsoft Dynamics and select Data management in the workspace’s menu. In Data management, select Configure entity export to database.
Step 2: Create a connection to the BYOD database by clicking on New and entering the connection string from the SQL database. The format for the connection string is as follows:
Server=myServerAddress;Database=myDataBase;User Id=myUsername;Password=myPassword;
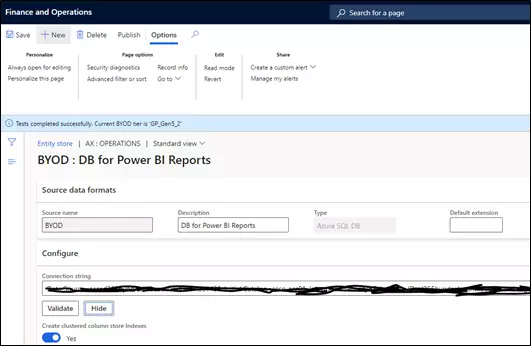
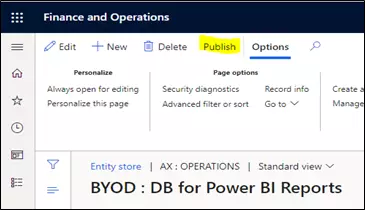
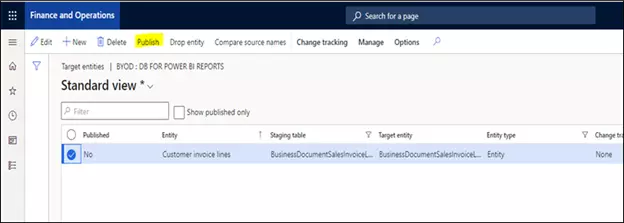
Step 3: Publish the entity that needs to be copied in Azure SQL. Publish will create the table’s structure in the Azure SQL DB. Click on the Publish button.
Select the check box for the entities that need to be published and click the Publish button.
A pop-up message will come. This means the job has been scheduled.
Once the publish job is successful, then for the entities we will see Yes on the Published field. You will get a message once the job has been successfully completed.

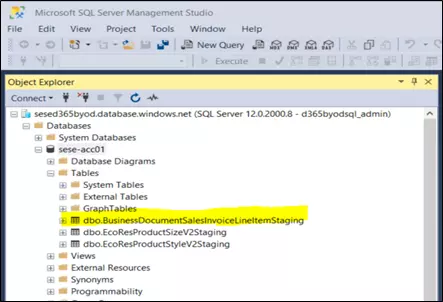
We have now created the schema in the Azure SQL database. To view this, we can open SSMS and refresh the server, we will then get to see the schema of the table in the database.
Step 4: Now, we can push the data from Microsoft Dynamics to Azure SQL. In Data management, click on Copy into legal entity.
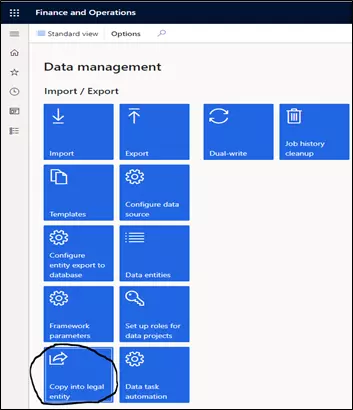
On this page, you can select either 1 entity or multiple entities to push data to BYOD.
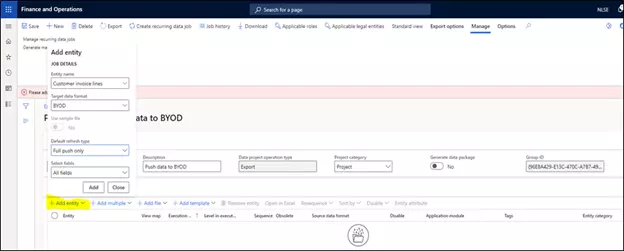
Once you have added all entities, you can click on the Export button. When the Export button is clicked, a job is created, and all the mentioned entity data will be pushed from Dynamics to BYOD.

A pop-up message will come. This means the batch job is scheduled. You will get a message once the job has been successfully completed.
Refresh the SSMS and you will see that the data is present in the table.
Part 3: Develop Power BI Reports based on the data in BYOD
Use Power BI Desktop to develop Power BI Reports. You can download Power BI Desktop here.
Step 1: Load the data to Power BI Desktop.
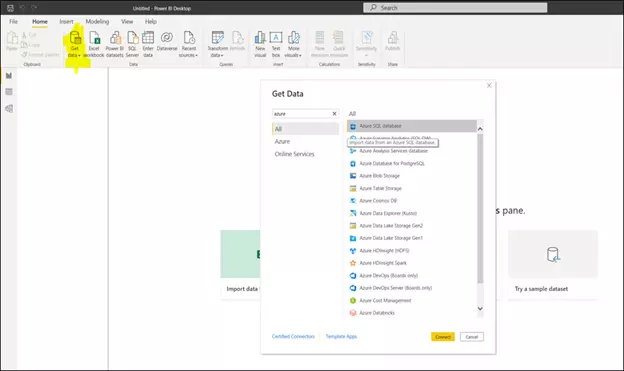
Open you have opened Power BI Desktop, select the Get data button and click on More. A popup will open where you can type Azure and select Azure SQL database and click on the Connect button.
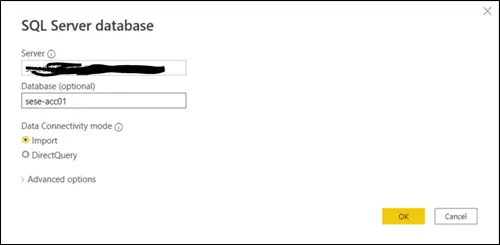
Enter the Server and Database details and click OK.
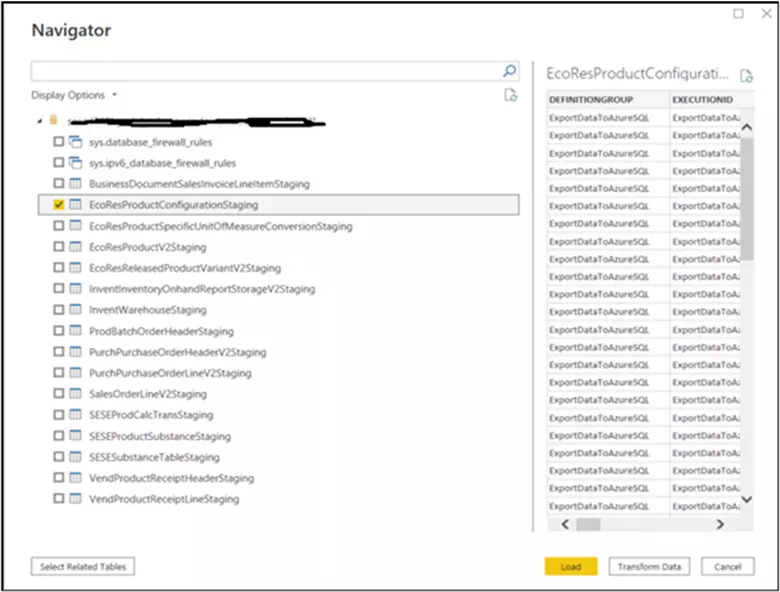
Select the table you want to load in Power BI and then click on the Load button.
Step 2: Once the data is loaded, we can transform the data. To do this, click on the Transform data button below.
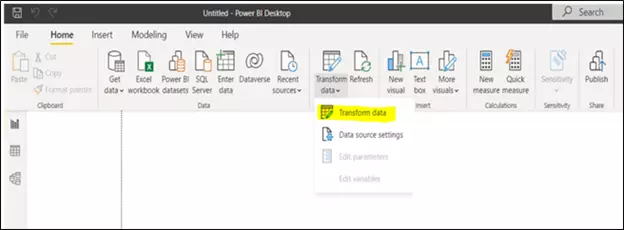
When the Transform data button is clicked, a new window is opened. Then, you can modify the data you have. For example, you can remove the fields you do not want to use and do some calculations.
Select the columns that you need to remove and then right-click and select Remove Columns.
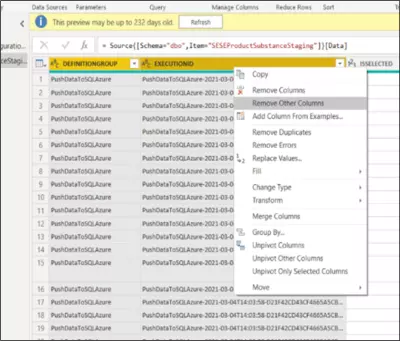
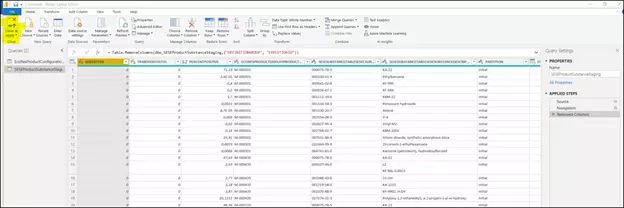
Once the data has been transformed, you can see all the steps taken to transform the data on the right side in the section APPLIED STEPS and then click the button Close & Apply to apply the changes.
Step 3: Design the Power BI Report.
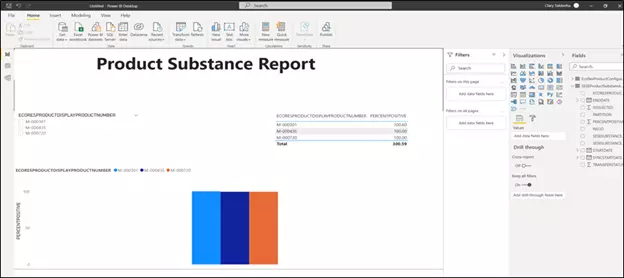
Once the Power BI report is ready, you can publish it. This will make the report available to the Power BI Dashboard.
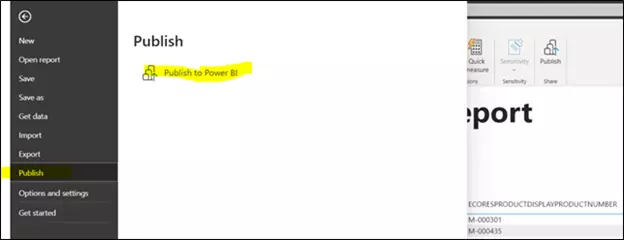
This final step brings a conclusion to this blog. Hopefully it has helped you to build Power BI Reports from your Dynamics data. See you in the next blog!
Reference: https://docs.microsoft.com/en-us/power-bi/fundamentals/desktop-getting-started

