Everything you need to know about custom help statements in D365 F&O
From one of our customers we received a requirement for their Microsoft Dynamics 365 for Finance and Operations (D365) implementation to have the custom user instructions and help files available from within the application. The user should not have to go to external sources to find process instruction text and/or animations.
Microsoft does offer such a solution out of the box, using the Business Process Libraries from within the D365 Lifecycle Services portal (LCS), and the Task Recorder functionality from within the D365 client.
In this blog article I will guide you step by step on how to implement this feature, according to our best practices.
Default Help
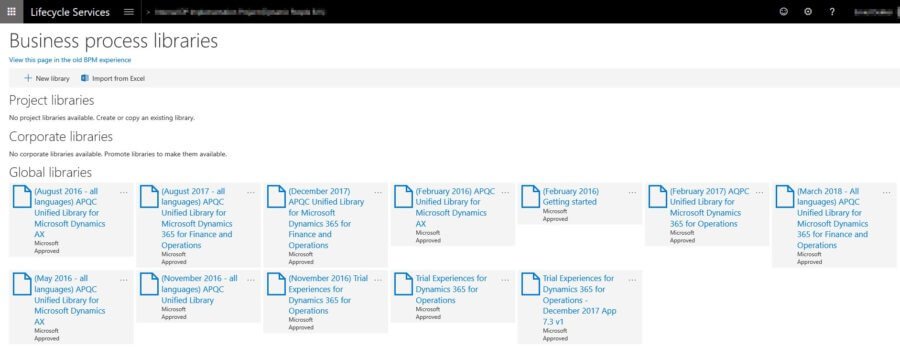
The Help-functionality of D365 consists of two elements; help instructions and task guides. The help instructions for the default functionality of D365 come from docs.microsoft.com. The task guides come from LCS. Within LCS there are a number of so-called Global libraries available from the Business Process libraries section. These libraries contain processes and task guides related to standard D365 processes and functionalities.
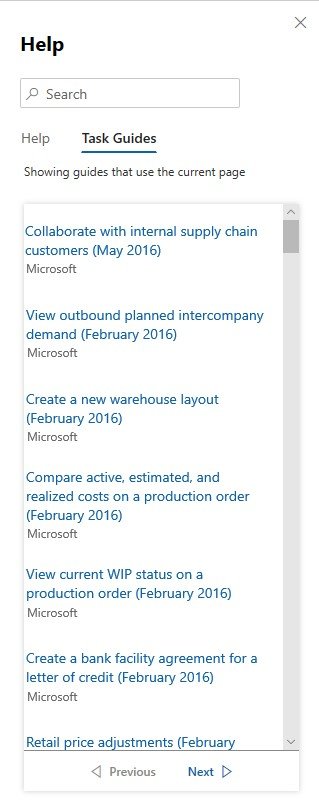
The Help windows with the Help content from docs.microsoft.com and the Task Guides from the Global process libraries looks as follows:
Link Business process libraries
We start with linking the Business process libraries to the Dynamics 365 environment.
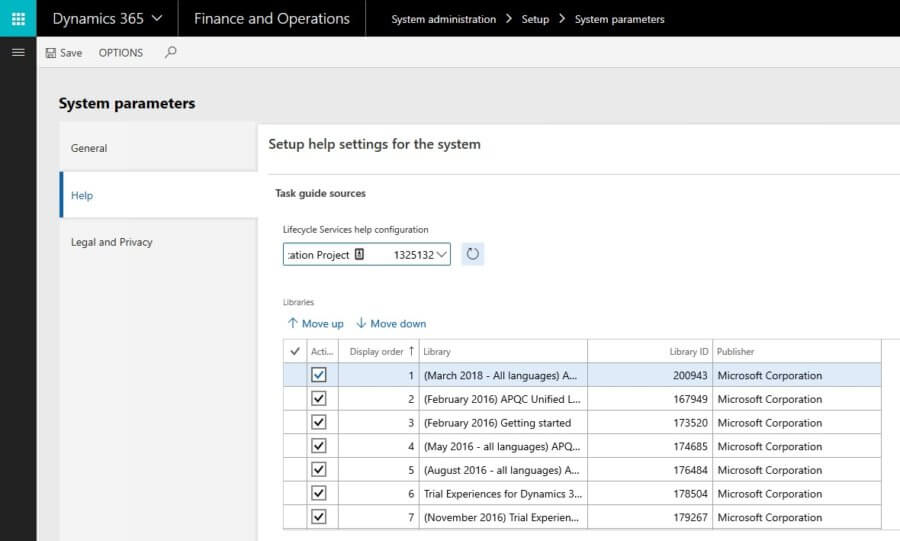
- Go to “System administration > Setup > System parameters”
- Select the form section”Help”.
- If not yet configured, select in the field “Lifecycle Services help configuration” the implementation project in LCS you wish to connect to.
If done, under “Libraries” you will see a list of all Global libaries available from Lifecycle Services portal. From this form you select or deselect libraries to make their content visible or invisible from the Help-functionality, and you can change the order and priority of the different libraries. Later in this blog we will create our own library, which will then also be visible in this list.
Create a customer Business process library
For our customer we created a separate, empty Business process library. The library was first divided in predefined sections. And later recorded Task Guide were saved to the different sections in the library.
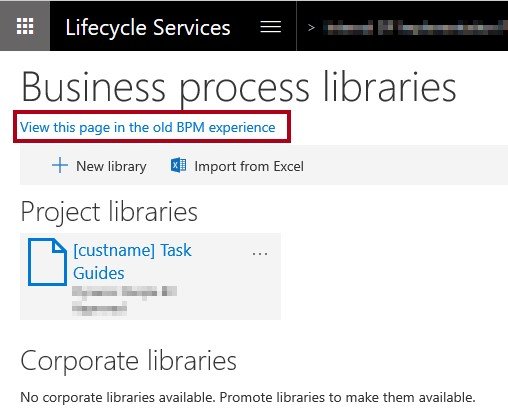
First, we have to create an empty customer dedicated Business process library. Logon to LCS with the deployment account (If you setup the LCS implementation project correctly there will be an administrative account, not linked to an individual user name, with which you deploy your environments. Logon to LCS with this account.). Navigate to the Business process libraries: “LCS menu > Business process modeler”. There you can make a choice to create a library manually or to do via an Excel import.
Create library manually
- Click on the button “+New library” to create a new library. .
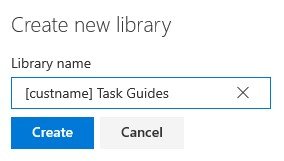
- Give the new library a name, like [custname] Task Guides” and click on “Create”.
Create sections
Vervolgens gaan we sessies aanmaken. Our experience it is best doing this in the old BPM experience. To do so, click on the link. “View this page in the old BPM experience.”
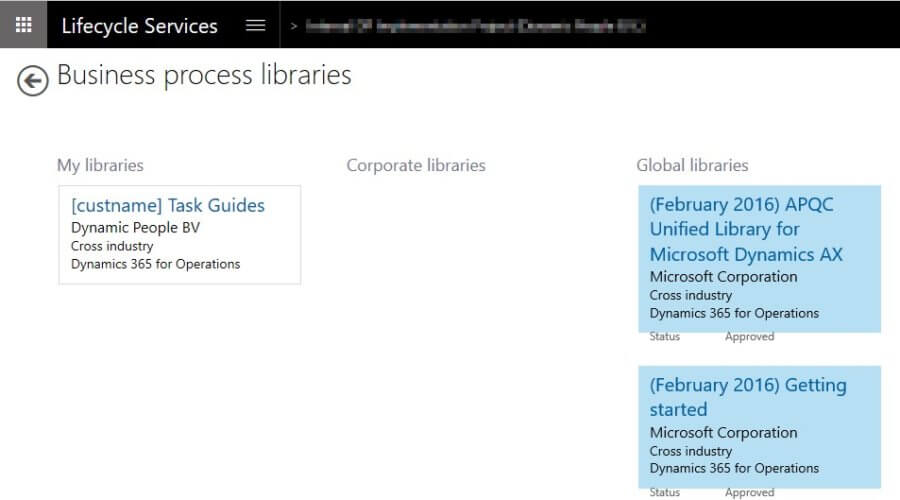
1. Click on the library [custname] Task Guides under My libraries to open it.
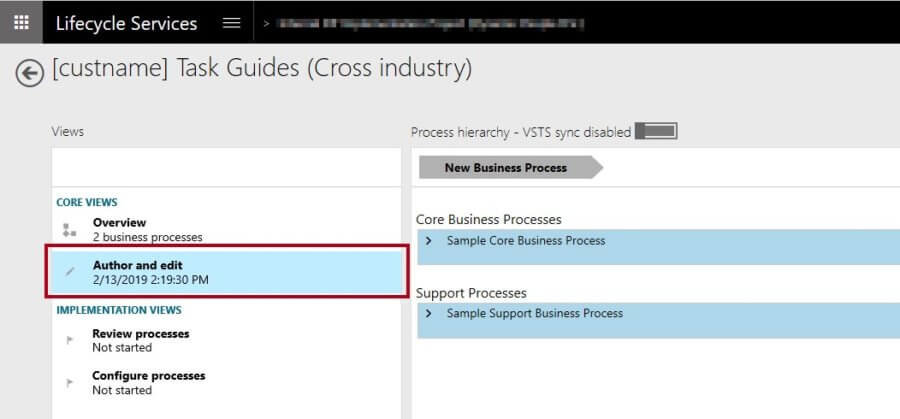
2. In the opened library navigate on the left side of the window to the core view “Author and edit”.
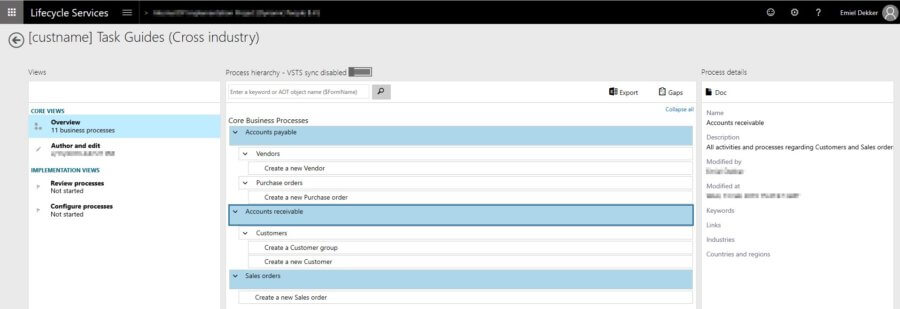
You can either define sections and add Task Guides to the section Core Business Processes or Support processes. Topics under either section will appear later in the Dynamics 365 client Help window. The divisions of the library into sections is for easy administrative purposes only.
Parent and Child processes
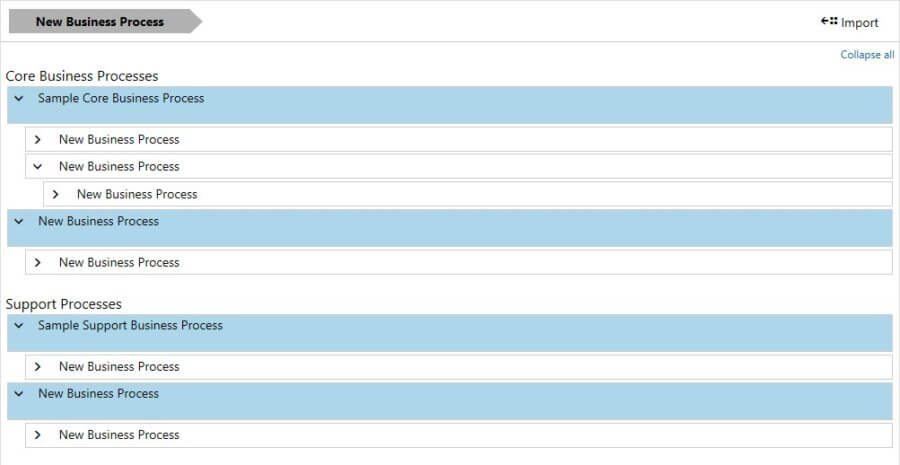
In the top middle section of the window you see a grey arrow with the text “New Business Process”. This is actually a button that you can drag down towards either the section Core Business Processes or Support Processes to create parent and child processes.
If you drag it on an existing process where the arrow before the process name is pointed towards the right, you create a new Parent process. You can use Parent process to create the different sections. You can compare these to chapters.

If you drag the New Business Process button to an existing process which has been folded open, and the arrow in front of the process name is pointed downwards, you create a child process. You create a child process for each process in the Dynamics 365 client to which you want to link recorded Task Guides in a later stage.

If desired, you can also continue to use deeper levels by dragging the button New Business Process to a child process.
Create a library with Excel
There is also a option to use an Excel template to configure a new library, and create the various parent and child level nodes.
1. Click on the button “Import from Excel” and then click on the link “Download template”. You could edit the Excel file as follows, as an example:
2. We have not yet been able to determine the difference in usage between the various values (setup, master and transaction)of the column “Usage profile”.
3. After a successful import you do need to approve the import by clicking on the link “Approve import”.

If you create a new library by importing the Excel sheet, the contents of the library will look as follows:
Changes to the library
For each parent and child process you can add/change the name and description on the right side of the screen. You can also add Keywords, and add more detailed information such as related “Industries” and “Countries and regions”. More specific process details can also be added or changed later.
Divide in…
You can divide the sections in the libary in different ways. An example to divide the library into section is to do it by Role, by Module, by Workspace or by processes.
Add library to an instance
If you have saved a first draft of the new library, you can for example add it to your Test instance of Dynamics 365.
1. Go to “System administration > Setup > System parameters”
2. Select the “Help” section.
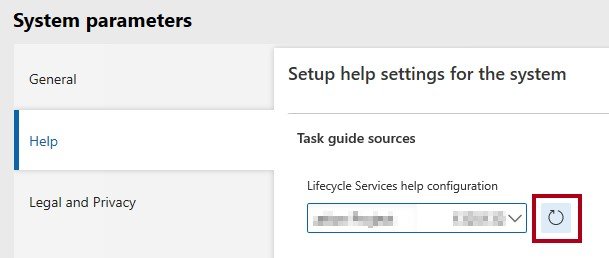
3. Behind the field “Lifecycle Services help configuration” click on the “Refresh”-button.
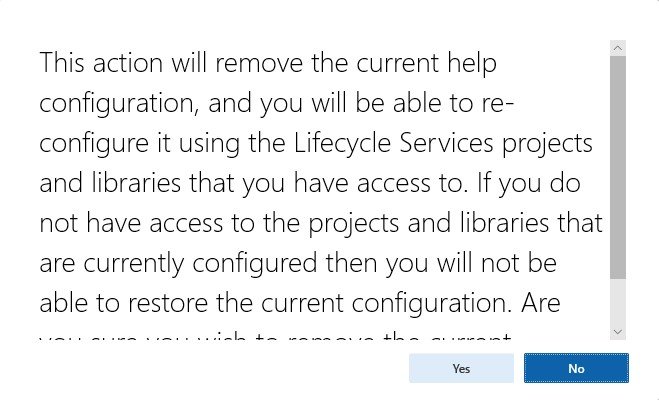
4. If prompted, click “Yes”.
If now you scroll down in the available Libraries, you will find your newly created library [custname]Task Guides”. You can decide to move this ‘help file’ to the top using the button “Move up”.
Record Task Guides
Before you start an actual recording of a process in Dynamics 365, make sure you do several test runs to make sure all required setup has been done, no process errors pop-up and a posting step can finish without issues.
As an example, we will create a Task guide on how to create a new Purchase order in Dynamics 365.
Note! This blog will not cover how to create Task recordings. It will continue to describe how to use them for storage and retrieval in Business process libraries.
- Once you have finished the last step of the recording, klik op de knop “Stop”.
- Click in the Task recorder pane on the option “Save to this PC”. The file will be locally stored with a file extension called .axtr. .
- In the Task recorder pane click on the button “Return to main menu”.
Tip! It is our experience that the best way to link recorded task recordings to a process in the a Business process library is to save them locally and upload them to a process in the library from LCS, instead of saving the recorded task to Lifecycle services from within the Dynamics 365 client.
Edit recording
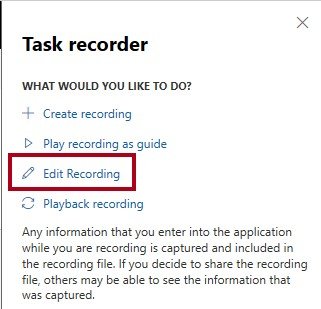
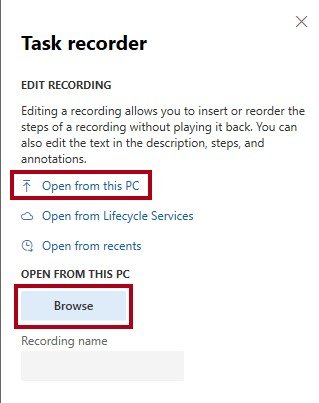
If you wish to edit a recording, you can import a recorded task from your local PC.
- Click on the button “Edit recording”.
2. Next click on the button “Open from this PC” and click on”Browse”.
3. Next click “Start”.
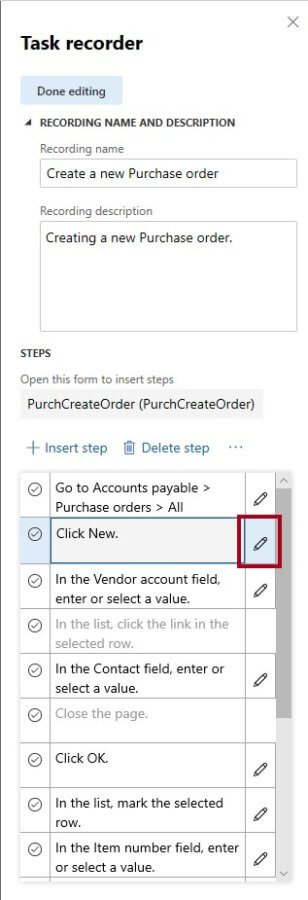
In the Task recorder pane, you are able to edit your recording. You can alter the Name or Description. And of needed you can Insert of Delete steps. At this point you can edit any step in the recoding by clicking on the “Edit” button of a process.
In this example we will change the default step name “Click New”. to “Click on the button New to create a new Purchase order”.We can also enter Notes. Click on “OK”.
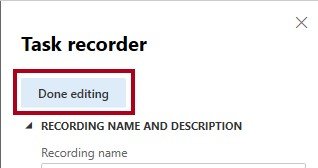
Once your finished, click on the button “Done editing”.
Save your edited Task recorder again to your PC. You can decide to overwrite the original recording, or work with versions.
Tip! In our experience it is a good idea to work with versioning.
Click on “Return to main menu.”
Test recording
To test a recording:
- Click on the button “Play recording as a guide” in the Task recorder pane.
- Browse for the locally saved recording.
- Click on the button “Open Task guide.”
- Next click on “Start Task guide.”
Upload recording to library
Once the recording is finished and tested, it can be uploaded to the corresponding process in the library.
- In LCS go to the “Business process modeler” and open the created library.
- Navigeer naar het betreffende proces en selecteer deze.
- Browse to the corresponding process and select it. On the right hand side of the screen, in the overview section, click on the button “Upload”.
4. Browse to the .axtr file and click on the button “Upload”.

You can identify processes that have a Task recording attached to them by a symbol behind the process name.
Add information to the process
To add more details to the process, click on the button “Edit mode”.
You can also add Keywords, and add more detailed information such as related “Industries”, and “Countries and regions”. When done adding details, click on the button “Save”. You can also mark a Process as reviewed. Select the process and click on the button “Mark as reviewed”.
Tip! I would especially advise to enter Keywords to the process. This will help finding the process easier for the end user. Now, when an end user is opening the Help pane in the Dynamics 365 client, selects “Task Guides” and searches for for example “Purchase”, the Task recording from the library will appear and can be selected.If the “Description” and text of the “Steps” are clear enough, the user might have sufficient information from this Help pane. But of course, the user can decide to start the guide by clicking the button “Start Task guide”.
I hope this blog post has been helpful in developing a Help library for your customers. Succes!


